はじめに
前回はシーン情報を作成するための bop_toolkit について説明しました。
今回は、bop_toolkit を使用して、マスク画像を作成していきます。
前提条件
前提条件は以下の通りです。
- Windows11 (三次元モデルの準備にのみ使用)
- Ubuntu22 (モデル準備以降に使用)
- Python3.10.x
- CloudCompare
- open3d == 0.16.0
- こちらの記事を参考に 三次元モデルを作成していること
- シーンの作成が完了していること
- こちらの記事を参考に bop_toolkit_lib のインストールとプログラムの修正が完了していること
プログラム変更
bop_toolkit_lib/inout.py
line 551
"int": ("i", 4),
↓
"uint": ("i", 4),
マスク画像の作成
前回説明した calc_gt_masks.py を使用して、マスク画像を作成していきます。
calc_gt_masks.py
# Author: Tomas Hodan (hodantom@cmp.felk.cvut.cz)
# Center for Machine Perception, Czech Technical University in Prague

"""Calculates masks of object models in the ground-truth poses."""

import os
os.environ["PYOPENGL_PLATFORM"] = "egl"
import numpy as np

from bop_toolkit_lib import config
from bop_toolkit_lib import dataset_params
from bop_toolkit_lib import inout
from bop_toolkit_lib import misc
from bop_toolkit_lib import renderer
from bop_toolkit_lib import visibility

# PARAMETERS.
################################################################################
p = {
  # See dataset_params.py for options.
  'dataset': 'lm',

  # Dataset split. Options: 'train', 'val', 'test'.
  'dataset_split': 'train',

  # Dataset split type. None = default. See dataset_params.py for options.
  'dataset_split_type': "pbr",

  # Tolerance used in the visibility test [mm].
  'delta': 15,  # 5 for ITODD, 15 for the other datasets.

  # Type of the renderer.
  'renderer_type': 'vispy',  # Options: 'vispy', 'cpp', 'python'.

  # Folder containing the BOP datasets.
  'datasets_path': "/path/to/makeNOCS/output_data/bop_data",
}
################################################################################


# Load dataset parameters.
dp_split = dataset_params.get_split_params(
  p['datasets_path'], p['dataset'], p['dataset_split'], p['dataset_split_type'])

model_type = None
if p['dataset'] == 'tless':
  model_type = 'cad'
dp_model = dataset_params.get_model_params(
  p['datasets_path'], p['dataset'], model_type)

scene_ids = dataset_params.get_present_scene_ids(dp_split)
for scene_id in scene_ids:

  # Load scene GT.
  scene_gt_path = dp_split['scene_gt_tpath'].format(
    scene_id=scene_id)
  scene_gt = inout.load_scene_gt(scene_gt_path)

  # Load scene camera.
  scene_camera_path = dp_split['scene_camera_tpath'].format(
    scene_id=scene_id)
  scene_camera = inout.load_scene_camera(scene_camera_path)

  # Create folders for the output masks (if they do not exist yet).
  mask_dir_path = os.path.dirname(
    dp_split['mask_tpath'].format(
      scene_id=scene_id, im_id=0, gt_id=0))
  misc.ensure_dir(mask_dir_path)

  mask_visib_dir_path = os.path.dirname(
    dp_split['mask_visib_tpath'].format(
      scene_id=scene_id, im_id=0, gt_id=0))
  misc.ensure_dir(mask_visib_dir_path)

  # Initialize a renderer.
  misc.log('Initializing renderer...')
  width, height = dp_split['im_size']
  ren = renderer.create_renderer(
    width, height, renderer_type=p['renderer_type'], mode='depth')

  # Add object models.
  for obj_id in dp_model['obj_ids']:
    ren.add_object(obj_id, dp_model['model_tpath'].format(obj_id=obj_id))

  im_ids = sorted(scene_gt.keys())
  for im_id in im_ids:

    if im_id % 100 == 0:
      misc.log(
        'Calculating masks - dataset: {} ({}, {}), scene: {}, im: {}'.format(
          p['dataset'], p['dataset_split'], p['dataset_split_type'], scene_id,
          im_id))

    K = scene_camera[im_id]['cam_K']
    fx, fy, cx, cy = K[0, 0], K[1, 1], K[0, 2], K[1, 2]

    # Load depth image.
    depth_path = dp_split['depth_tpath'].format(
      scene_id=scene_id, im_id=im_id)
    depth_im = inout.load_depth(depth_path)
    depth_im *= scene_camera[im_id]['depth_scale']  # to [mm]
    dist_im = misc.depth_im_to_dist_im_fast(depth_im, K)

    custom_mask = np.ones((height, width), dtype=float, order="C")
    custom_i = 0

    for gt_id, gt in enumerate(scene_gt[im_id]):

      # Render the depth image.
      depth_gt = ren.render_object(
        gt['obj_id'], gt['cam_R_m2c'], gt['cam_t_m2c'], fx, fy, cx, cy)['depth']

      # Convert depth image to distance image.
      dist_gt = misc.depth_im_to_dist_im_fast(depth_gt, K)

      # Mask of the full object silhouette.
      mask = dist_gt > 0
      custom_mask[mask==True] = 0

      # Mask of the visible part of the object silhouette.
      mask_visib = visibility.estimate_visib_mask_gt(
        dist_im, dist_gt, p['delta'], visib_mode='bop19')

      # Save the calculated masks.
      mask_path = dp_split['mask_tpath'].format(
        scene_id=scene_id, im_id=im_id, gt_id=gt_id)
      inout.save_im(mask_path, 255 * mask.astype(np.uint8))

      mask_visib_path = dp_split['mask_visib_tpath'].format(
        scene_id=scene_id, im_id=im_id, gt_id=gt_id)
      inout.save_im(mask_visib_path, 255 * mask_visib.astype(np.uint8))

    custom_mask_folder = dp_split['custom_mask_folder'].format(scene_id=scene_id)
    os.makedirs(custom_mask_folder, exist_ok=True)

    custom_mask_path = dp_split['custom_mask_path'].format(
      scene_id=scene_id, im_id=im_id
    )
    inout.save_im(custom_mask_path, 255 * custom_mask.astype(np.uint8))
    print("results saved. {}".format(custom_mask_path))
上記プログラムを実行します。
cd makeNOCS/bop_toolkit
python3 scripts/calc_gt_masks.py
上記を実行すると、
output_data/bop_data/lm/train_pbr/000000/custom_mask
に白黒反転されたマスク画像が保存されていると思います。
この白黒反転は、今後の記事で必要になってくるので、確認しておいてください。
プログラムの説明
上から順に説明していきます。
import os
os.environ["PYOPENGL_PLATFORM"] = "egl"
import numpy as np

from bop_toolkit_lib import config
from bop_toolkit_lib import dataset_params
from bop_toolkit_lib import inout
from bop_toolkit_lib import misc
from bop_toolkit_lib import renderer
from bop_toolkit_lib import visibility
環境によって OPENGL が異なると思いますので、揃えるためにも egl を使用しています。
bop_toolkit_lib 関連は、bop_toolkit 付属のフォルダから読み込んでいます。
# PARAMETERS.
################################################################################
p = {
  # See dataset_params.py for options.
  'dataset': 'lm',

  # Dataset split. Options: 'train', 'val', 'test'.
  'dataset_split': 'train',

  # Dataset split type. None = default. See dataset_params.py for options.
  'dataset_split_type': "pbr",

  # Tolerance used in the visibility test [mm].
  'delta': 15,  # 5 for ITODD, 15 for the other datasets.

  # Type of the renderer.
  'renderer_type': 'vispy',  # Options: 'vispy', 'cpp', 'python'.

  # Folder containing the BOP datasets.
  'datasets_path': "/path/to/makeNOCS/output_data/bop_data",
}
################################################################################
必要なパラメーターを設定します。
- dataset … Linemod( lm ) を指定
- dataset_split … train を指定( val を作りたいときは train から分割してください )
- dataset_split_type … Linemod を使用する場合、pbr を選択
- delta … Linemod は 15 固定
- renderer_type … こだわりがなければ vispy 固定
- datasets_path … bop_data までのフルパスを指定
# Load dataset parameters.
dp_split = dataset_params.get_split_params(
  p['datasets_path'], p['dataset'], p['dataset_split'], p['dataset_split_type'])

model_type = None
if p['dataset'] == 'tless':
  model_type = 'cad'
dp_model = dataset_params.get_model_params(
  p['datasets_path'], p['dataset'], model_type)
続いて、データセットのパラメータを読み込んでいきます。
正常に読込めているか確認したい場合は、dp_model を print() で出力してみてください。
scene_ids = dataset_params.get_present_scene_ids(dp_split)シーンの数をデータセットから取得します。
フォルダの数で自動的にシーン数を計算してくれるので、特にこちらでさわる必要はありません。
for scene_id in scene_ids:

  # Load scene GT.
  scene_gt_path = dp_split['scene_gt_tpath'].format(
    scene_id=scene_id)
  scene_gt = inout.load_scene_gt(scene_gt_path)
makeNOCS/output_data/bop_data/lm/train_pbr/000000/scene_gt.json を読み込みます。
scene_gt.json について
ここで一度 scene_gt.json の中身を確認してみます。
{
  "0": [{"cam_R_m2c": [0.8301925659179688, -0.40330082178115845, 0.38487502932548523, 0.16768349707126617, -0.4777633547782898, -0.8623368144035339, 0.5316601991653442, 0.7804428339004517, -0.32900872826576233],
         "cam_t_m2c": [-137.1427001953125, 39.308502197265625, 873.249755859375],
         "obj_id": 1
        }, {
         "cam_R_m2c": [0.6273878216743469, 0.6769458651542664, 0.38487502932548523, 0.5058815479278564, 0.021431438624858856, -0.8623366951942444, -0.5920037031173706, 0.7357207536697388, -0.3290085792541504],
         "cam_t_m2c": [-185.1438751220703, -43.27933883666992, 1033.561767578125],
         "obj_id": 1
        }, {"cam_R_m2c": [-0.2274658977985382, -0.8945003747940063, 0.3848748505115509, -0.4340941607952118, -0.260648638010025, -0.8623368740081787, 0.871677577495575, -0.36322399973869324, -0.3290088474750519], "cam_t_m2c": [-61.231143951416016, 38.8118896484375, 963.3528442382812], "obj_id": 1}, {"cam_R_m2c": [0.19119614362716675, -0.9029481410980225, 0.38487499952316284, -0.27424484491348267, -0.4256351590156555, -0.8623367547988892, 0.9424616098403931, 0.05932551994919777, -0.32900872826576233], "cam_t_m2c": [-141.57769775390625, -99.3441162109375, 1231.472412109375], "obj_id": 1}, {"cam_R_m2c": [-0.6574461460113525, 0.6477934718132019, 0.38487499952316284, -0.005952994804829359, 0.5063002705574036, -0.8623368144035339, -0.7534784078598022, -0.5692309141159058, -0.32900896668434143], "cam_t_m2c": [-21.703271865844727, 14.672346115112305, 1072.8624267578125], "obj_id": 1}, {"cam_R_m2c": [-0.299786776304245, 0.8729255795478821, 0.38487496972084045, 0.22034230828285217, 0.4558779299259186, -0.8623366951942444, -0.9282118082046509, -0.17371290922164917, -0.3290086090564728], "cam_t_m2c": [144.46917724609375, 31.001426696777344, 1224.452880859375], "obj_id": 1}, {"cam_R_m2c": [-0.5190771818161011, 0.7631710767745972, 0.38487499952316284, 0.09251683205366135, 0.49781134724617004, -0.8623366355895996, -0.8497055172920227, -0.41201186180114746, -0.32900863885879517], "cam_t_m2c": [-41.96995162963867, 131.00155639648438, 744.2540893554688], "obj_id": 1}, {"cam_R_m2c": [-0.7001251578330994, 0.601412296295166, 0.3848750591278076, -0.040494125336408615, 0.5047134160995483, -0.8623368740081787, -0.7128715515136719, -0.6193285584449768, -0.329009085893631], "cam_t_m2c": [303.18267822265625, 86.52058410644531, 1264.5997314453125], "obj_id": 1}, {"cam_R_m2c": [0.6700555682182312, -0.634741485118866, 0.38487493991851807, 0.015906687825918198, -0.5060852766036987, -0.8623365759849548, 0.7421404123306274, 0.583935558795929, -0.3290086090564728], "cam_t_m2c": [221.71493530273438, 103.85931396484375, 1123.8533935546875], "obj_id": 1}, {"cam_R_m2c": [-0.9091964960098267, -0.15885096788406372, 0.38487508893013, -0.41557708382606506, 0.2892597019672394, -0.8623368144035339, 0.02565411664545536, -0.9439785480499268, -0.32900896668434143], "cam_t_m2c": [103.7608871459961, 149.1444091796875, 867.1776733398438], "obj_id": 1}],
このファイルは各シーンの各オブジェクト毎に cam_R_m2c, cam_t_m2c, obj_id が記載されている非常に長いファイルです。
cam_R_m2c はカメラの回転行列、cam_t_m2c はカメラの平行移動行列となります。どちらもモデル基準となります。
# Load scene camera.
  scene_camera_path = dp_split['scene_camera_tpath'].format(
    scene_id=scene_id)
  scene_camera = inout.load_scene_camera(scene_camera_path)
makeNOCS/output_data/bop_data/lm/train_pbr/000000/scene_camera.json を読み込みます。
scene_camera.json について
ここで、scene_camera.json を確認します。
{
  "0": {"cam_K": [572.411363389757, 0.0, 325.2611083984375, 0.0, 573.5704328585578, 242.04899588216654, 0.0, 0.0, 1.0],
        "cam_R_w2c": [0.9163048267364502, -0.11070971190929413, 0.38487499952316284, 0.31423723697662354, -0.3970269560813904, -0.8623366355895996, 0.2482748180627823, 0.9111053347587585, -0.3290086090564728],
        "cam_t_w2c": [170.6673583984375, 91.61397552490234, 1111.882080078125],
        "depth_scale": 1.0},
cam_K はカメラパラメータです。カメラ依存なので実機データでやる際は先にこちらのパラメータを変更しておく必要があります。
cam_R_w2c は、先ほどと同じ回転行列で、ワールド座標を基準としています。cam_t_w2c も同様です。
# Create folders for the output masks (if they do not exist yet).
  mask_dir_path = os.path.dirname(
    dp_split['mask_tpath'].format(
      scene_id=scene_id, im_id=0, gt_id=0))
  misc.ensure_dir(mask_dir_path)

  mask_visib_dir_path = os.path.dirname(
    dp_split['mask_visib_tpath'].format(
      scene_id=scene_id, im_id=0, gt_id=0))
  misc.ensure_dir(mask_visib_dir_path)
作成されたマスク画像を保存するフォルダを作成します。
どこに保存するかは dataset_params.py によって決まっているので、変更が必要な場合はそちらを変更してください。
# Initialize a renderer.
  misc.log('Initializing renderer...')
  width, height = dp_split['im_size']
  ren = renderer.create_renderer(
    width, height, renderer_type=p['renderer_type'], mode='depth')
今回は vispy でレンダラーを起動します。三次元姿勢推定なので深度情報も追加しておきます。
# Add object models.
for obj_id in dp_model['obj_ids']:
    ren.add_object(obj_id, dp_model['model_tpath'].format(obj_id=obj_id))
各オブジェクトを配置していきます。
add_object 関数では、モデル情報から3Dバウンディングボックスの各点情報を取出し、法線情報も取出す処理を行っています。
im_ids = sorted(scene_gt.keys())
for im_id in im_ids:

    if im_id % 100 == 0:
      misc.log(
        'Calculating masks - dataset: {} ({}, {}), scene: {}, im: {}'.format(
          p['dataset'], p['dataset_split'], p['dataset_split_type'], scene_id,
          im_id))

    K = scene_camera[im_id]['cam_K']
    fx, fy, cx, cy = K[0, 0], K[1, 1], K[0, 2], K[1, 2]
scene の画像ごとに処理を行います。
まずは画像のカメラパラメータを読込みます。
# Load depth image.
    depth_path = dp_split['depth_tpath'].format(
      scene_id=scene_id, im_id=im_id)
    depth_im = inout.load_depth(depth_path)
    depth_im *= scene_camera[im_id]['depth_scale']  # to [mm]
    dist_im = misc.depth_im_to_dist_im_fast(depth_im, K)
深度画像を読込みます。深度から距離画像へと変換しています。
custom_mask = np.ones((height, width), dtype=float, order="C")
custom_i = 0
カスタムデータ用のマスク画像を初期化します。
for gt_id, gt in enumerate(scene_gt[im_id]):

      # Render the depth image.
      depth_gt = ren.render_object(
        gt['obj_id'], gt['cam_R_m2c'], gt['cam_t_m2c'], fx, fy, cx, cy)['depth']

      # Convert depth image to distance image.
      dist_gt = misc.depth_im_to_dist_im_fast(depth_gt, K)
画像の gt 情報をレンダリングします。さらに深度画像を距離画像に変換します。
 # Mask of the full object silhouette.
      mask = dist_gt > 0
      custom_mask[mask==True] = 0

      # Mask of the visible part of the object silhouette.
      mask_visib = visibility.estimate_visib_mask_gt(
        dist_im, dist_gt, p['delta'], visib_mode='bop19')
マスク画像を作成していきます。併せて白黒反転のカスタムマスク画像を作成します。
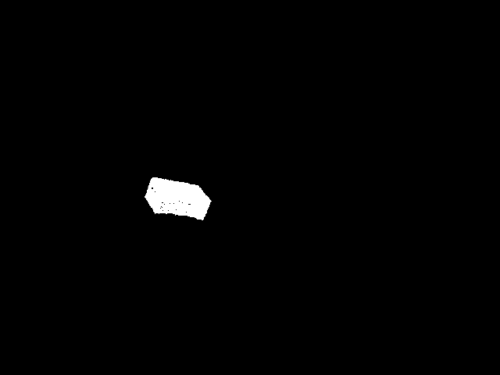
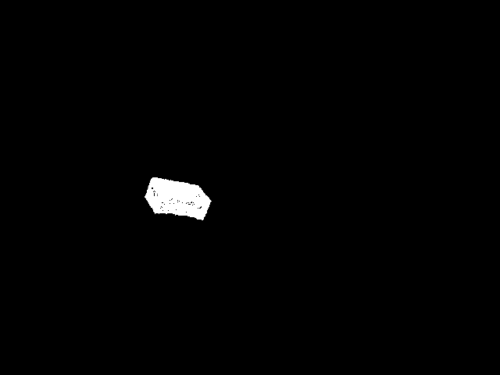
mask_visib は可視部分のマスク画像です。


左が mask, 右が mask_visib です。
# Save the calculated masks.
      mask_path = dp_split['mask_tpath'].format(
        scene_id=scene_id, im_id=im_id, gt_id=gt_id)
      inout.save_im(mask_path, 255 * mask.astype(np.uint8))

      mask_visib_path = dp_split['mask_visib_tpath'].format(
        scene_id=scene_id, im_id=im_id, gt_id=gt_id)
      inout.save_im(mask_visib_path, 255 * mask_visib.astype(np.uint8))
mask, mask_visib を保存します。
custom_mask_folder = dp_split['custom_mask_folder'].format(scene_id=scene_id)
    os.makedirs(custom_mask_folder, exist_ok=True)

    custom_mask_path = dp_split['custom_mask_path'].format(
      scene_id=scene_id, im_id=im_id
    )
    inout.save_im(custom_mask_path, 255 * custom_mask.astype(np.uint8))
    print("results saved. {}".format(custom_mask_path))
カスタムマスク画像を保存します。
おわりに
今回はここまでとします。
ここまでの作業で、
- makeNOCS/output_data/bop_data/lm/train_pbr/000000/custom_mask
- makeNOCS/output_data/bop_data/lm/train_pbr/000000/mask
- makeNOCS/output_data/bop_data/lm/train_pbr/000000/mask_visib
の上記 3フォルダが作成されていると思います。
次回は、各シーンの gt 情報を json ファイルにまとめていく作業(アノテーションデータの作成)を行います。


コメント