はじめに
前回は Mask3D のデモを動かしてみました。

今回は、学習無しで特徴点のマッチングを行うことができる LightGlue を動かしてみます。
githubはこちらです。
前提条件
前提条件は以下の通りです。
- Windows11
- Python3.10
- pytorch==1.13.1+cu117
LightGlue のインストール
インストールは簡単です。
git clone https://github.com/cvg/LightGlue.git && cd LightGlue
python -m pip install -e .
torchがインストールされてしまうかもしれないので、この後にtorchのGPUを確認するのをお勧めします。
デモプログラム
デモプログラムを以下のようにします。
demo.py
from lightglue import LightGlue, SuperPoint, DISK, SIFT, ALIKED, DoGHardNet
from lightglue.utils import load_image, rbd
from lightglue import viz2d
from matplotlib.patches import Rectangle
import matplotlib.pyplot as plt
# SuperPoint+LightGlue
extractor = SuperPoint(max_num_keypoints=2048).eval() # load the extractor
matcher = LightGlue(features='superpoint').eval() # load the matcher
# load each image as a torch.Tensor on GPU with shape (3,H,W), normalized in [0,1]
image0 = load_image('./A.png')
image1 = load_image('./B.png')
# extract local features
feats0 = extractor.extract(image0) # auto-resize the image, disable with resize=None
feats1 = extractor.extract(image1)
# match the features
matches01 = matcher({'image0': feats0, 'image1': feats1})
feats0, feats1, matches01 = [rbd(x) for x in [feats0, feats1, matches01]] # remove batch dimension
kpts0, kpts1, matches = feats0["keypoints"], feats1["keypoints"], matches01["matches"]
m_kpts0, m_kpts1 = kpts0[matches[..., 0]], kpts1[matches[..., 1]]
axes = viz2d.plot_images([image0, image1])
viz2d.plot_matches(m_kpts0, m_kpts1, color="lime", lw=0.2)
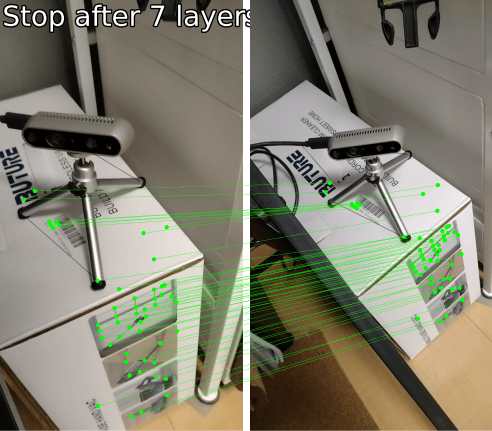
viz2d.add_text(0, f'Stop after {matches01["stop"]} layers', fs=20)
viz2d.save_plot("C.png")
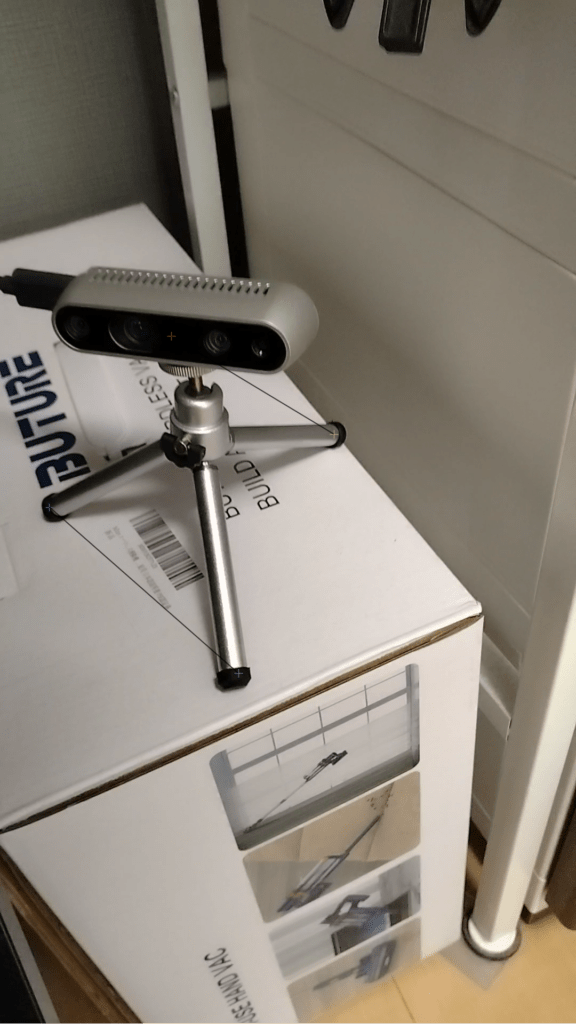
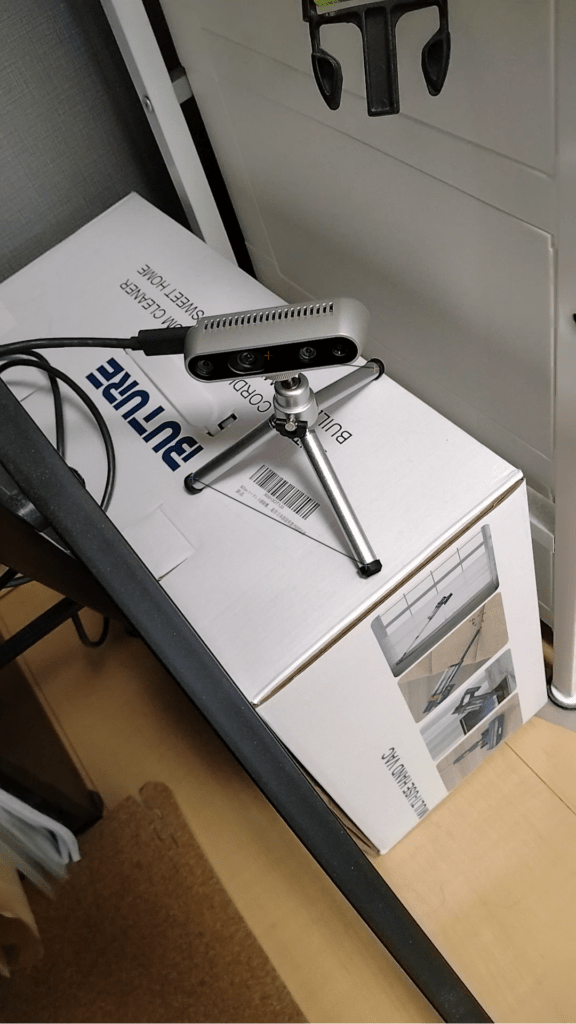
A.png と B.png は以下の画像を用意しました。
上記のプログラムを実行すると、C.png が出力されます。
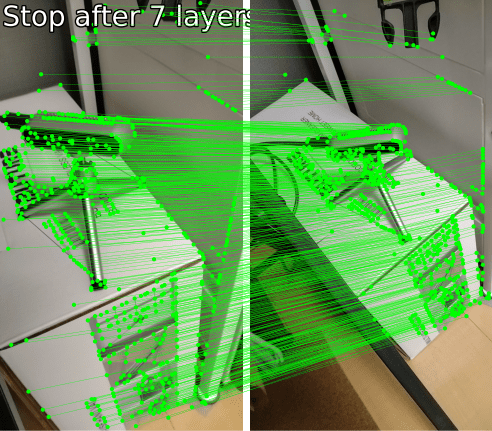
スマホで適当に撮影した画像ですが、しっかり特徴点のマッチングができていますね。
特徴点の集合から矩形を作成
続いて、特徴点の集合から矩形を作成していきます。
こちらの github に掲載がありました。
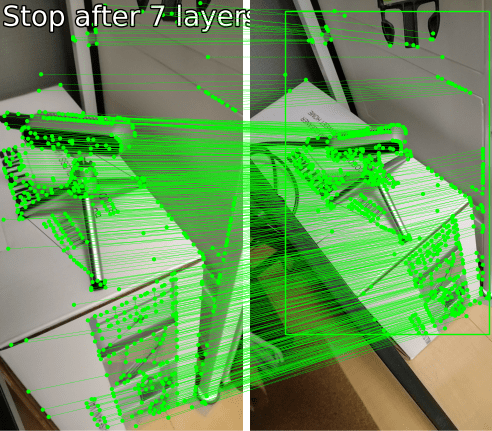
以下のプログラムを追加してください。
tl = m_kpts1.min(dim=-2).values  # top-left corner
br = m_kpts1.max(dim=-2).values  # bottom-right corner
axes = plt.gcf().axes
axes[1].add_patch(Rectangle(tl, br[0] - tl[0], br[1]-tl[1], fill=False, color="lime"))
viz2d.save_plot("C.png")
出力画像は、以下のようになります。
マッチングスコアを抽出
続いて、特徴点の一致度を抽出します。
scores = matches01['scores']
top_k_int = 50
top_k = torch.topk(scores, top_k_int).indices
m_kpts0, m_kpts1 = m_kpts0[top_k], m_kpts1[top_k]

axes = viz2d.plot_images([image0, image1])
viz2d.plot_matches(m_kpts0, m_kpts1, color="lime", lw=0.2)
viz2d.add_text(0, f'Stop after {matches01["stop"]} layers', fs=20)

viz2d.save_plot("C.png")
以下のような画像が出力されます。
意外と RealSense の一致度は高くないみたいです。
RGBのエッジが効いてるところがメインみたいですね。
特徴点から回転行列を作成し、画像を回転
こちらのサイトを参考にさせていただきました。
query_kp = np.reshape(m_kpts0.numpy(), (-1, 1, 2))
train_kp = np.reshape(m_kpts1.numpy(), (-1, 1, 2))

A, inliers = cv2.estimateAffinePartial2D(train_kp, query_kp)

M = A[:2, :2]
t = A[:, 2]

degree = np.rad2deg(-np.arctan2(A[0, 1], A[0, 0]))
print({"angle": degree, "M": M, "t": t})

image0_cv2 = cv2.imread("../A.png")
image1_cv2 = cv2.imread("../B.png")

h, w = image0_cv2.shape[:2]
center = (int(w/2),int(h/2))
trans = cv2.getRotationMatrix2D(center, degree , 1)
out = cv2.warpAffine(image0_cv2, trans, (w, h))

out = cv2.resize(out, center)
image0_cv2 = cv2.resize(image0_cv2, center)
image1_cv2 = cv2.resize(image1_cv2, center)

cv2.imshow("source_out", out)
cv2.imshow("source", image0_cv2)
cv2.imshow("target", image1_cv2)
cv2.waitKey(0)
cv2.destroyAllWindows()
出力画像は以下のようになります。
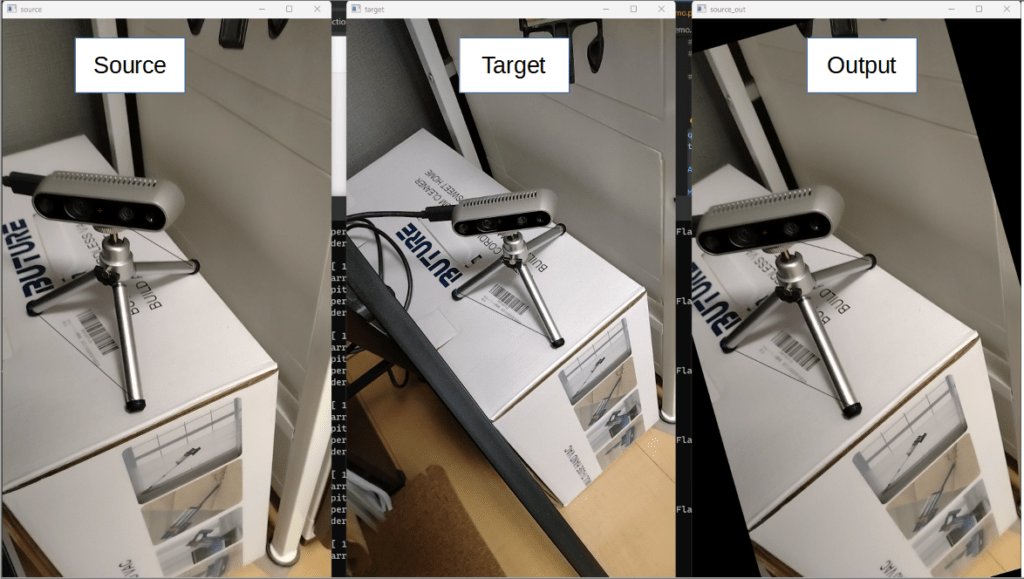
いい感じに回転できていますね!
おわりに
今回は LightGlue についてデモを試してみました。
これを使えば常に同じ姿勢で物体の検査に活用できそうです。

コメント