はじめに
前回までは、点群データをメッシュデータに変更し、obj, mtl ファイルを作成しました。
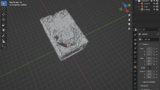
今回は、blenderproc を使用して、物体が複数存在するシーンを作成していきます。
前提条件
前提条件は以下の通りです。
- Windows11 (三次元モデルの準備にのみ使用)
- Ubuntu22 (モデル準備以降に使用)
- Python3.10.x
- CloudCompare
- open3d == 0.16.0
- こちらの記事を参考に 三次元モデルを作成していること
blenderproc のインストール
シミュレーションツールである blenderproc をインストールしていきます。
様々なライブラリをインストールするので、仮想環境で作業していきます。
python3 -m venv venv
source venv/bin/activate
python3 -m pip install -U pip
python3 -m pip install blenderproc==2.7.0
cd makeNOCS
blenderproc quickstart
git clone https://github.com/DLR-RM/BlenderProc
touch BlenderProc/examples/datasets/bop_challenge/main_lm_uprightcustom.py
blenderproc download cc_textures cc_textures
この BlenderProc の github には、様々な機能が実装されています。そして、Readme も充実しているので、一度読んでみることをお勧めします。
BOPに関しても様々な機能を提供しており、こちら で確認可能です。
makeNOCS/BlenderProc/examples/datasets/bop_challenge/main_lm_uprightcustom.py
上記ファイルは、main_lm_upright.py をカスタムデータ用に編集したものです。
lm は、Linemod データセットに対応していますので、データを Linemod に合わせて用意する必要があります。
import blenderproc as bproc
import argparse
import os
import numpy as np

parser = argparse.ArgumentParser()
parser.add_argument('bop_parent_path', help="Path to the bop datasets parent directory")
parser.add_argument('cc_textures_path', default="resources/cctextures", help="Path to downloaded cc textures")
parser.add_argument('output_dir', help="Path to where the final files will be saved ")
parser.add_argument('--num_scenes', type=int, default=200, help="How many scenes with 25 images each to generate")
args = parser.parse_args()

bproc.init()

SIZE=10

# load bop objects into the scene
target_bop_objs = bproc.loader.load_bop_objs(bop_dataset_path = os.path.join(args.bop_parent_path, 'lm'), mm2m=True,
                                            num_of_objs_to_sample=SIZE, obj_ids=[1, 1, 1, 1, 1, 1, 1, 1, 1, 1])

# # load distractor bop objects
# tless_dist_bop_objs = bproc.loader.load_bop_objs(bop_dataset_path = os.path.join(args.bop_parent_path, 'tless'), model_type = 'cad', mm2m = True)
# ycbv_dist_bop_objs = bproc.loader.load_bop_objs(bop_dataset_path = os.path.join(args.bop_parent_path, 'ycbv'), mm2m = True)
# tyol_dist_bop_objs = bproc.loader.load_bop_objs(bop_dataset_path = os.path.join(args.bop_parent_path, 'tyol'), mm2m = True)

# load BOP datset intrinsics
bproc.loader.load_bop_intrinsics(bop_dataset_path = os.path.join(args.bop_parent_path, 'lm'))

# set shading and hide objects
for obj in (target_bop_objs):# + tless_dist_bop_objs + ycbv_dist_bop_objs + tyol_dist_bop_objs):
    obj.set_shading_mode('auto')
    obj.hide(True)

# create room
room_planes = [bproc.object.create_primitive('PLANE', scale=[2, 2, 1]),
               bproc.object.create_primitive('PLANE', scale=[2, 2, 1], location=[0, -2, 2], rotation=[-1.570796, 0, 0]),
               bproc.object.create_primitive('PLANE', scale=[2, 2, 1], location=[0, 2, 2], rotation=[1.570796, 0, 0]),
               bproc.object.create_primitive('PLANE', scale=[2, 2, 1], location=[2, 0, 2], rotation=[0, -1.570796, 0]),
               bproc.object.create_primitive('PLANE', scale=[2, 2, 1], location=[-2, 0, 2], rotation=[0, 1.570796, 0])]

# sample light color and strenght from ceiling
light_plane = bproc.object.create_primitive('PLANE', scale=[3, 3, 1], location=[0, 0, 10])
light_plane.set_name('light_plane')
light_plane_material = bproc.material.create('light_material')

# sample point light on shell
light_point = bproc.types.Light()
light_point.set_energy(200)

# load cc_textures
cc_textures = bproc.loader.load_ccmaterials(args.cc_textures_path)

# Define a function that samples 6-DoF poses
def sample_pose_func(obj: bproc.types.MeshObject):
    min = np.random.uniform([-0.3, -0.3, 0.0], [-0.2, -0.2, 0.0])
    max = np.random.uniform([0.2, 0.2, 0.4], [0.3, 0.3, 0.6])
    obj.set_location(np.random.uniform(min, max))
    obj.set_rotation_euler(bproc.sampler.uniformSO3())

# activate depth rendering without antialiasing and set amount of samples for color rendering
bproc.renderer.enable_depth_output(activate_antialiasing=False)
bproc.renderer.set_max_amount_of_samples(100)

for i in range(args.num_scenes):

    # Sample bop objects for a scene
    sampled_target_bop_objs = list(np.random.choice(target_bop_objs, size=SIZE, replace=False))
    # sampled_distractor_bop_objs = list(np.random.choice(tless_dist_bop_objs, size=3, replace=False))
    # sampled_distractor_bop_objs += list(np.random.choice(ycbv_dist_bop_objs, size=3, replace=False))
    # sampled_distractor_bop_objs += list(np.random.choice(tyol_dist_bop_objs, size=3, replace=False))

    # Randomize materials and set physics
    for obj in (sampled_target_bop_objs):# + sampled_distractor_bop_objs):
        mat = obj.get_materials()[0]
        if obj.get_cp("bop_dataset_name") in ['itodd', 'tless']:
            grey_col = np.random.uniform(0.1, 0.9)
            mat.set_principled_shader_value("Base Color", [grey_col, grey_col, grey_col, 1])
        mat.set_principled_shader_value("Roughness", np.random.uniform(0, 1.0))
        mat.set_principled_shader_value("Specular", np.random.uniform(0, 1.0))
        obj.hide(False)

    # Sample two light sources
    light_plane_material.make_emissive(emission_strength=np.random.uniform(3,6),
                                    emission_color=np.random.uniform([0.5, 0.5, 0.5, 1.0], [1.0, 1.0, 1.0, 1.0]))
    light_plane.replace_materials(light_plane_material)
    light_point.set_color(np.random.uniform([0.5,0.5,0.5],[1,1,1]))
    location = bproc.sampler.shell(center = [0, 0, 0], radius_min = 1, radius_max = 1.5,
                            elevation_min = 5, elevation_max = 89)
    light_point.set_location(location)

    # sample CC Texture and assign to room planes
    random_cc_texture = np.random.choice(cc_textures)
    for plane in room_planes:
        plane.replace_materials(random_cc_texture)


    # Sample object poses and check collisions
    bproc.object.sample_poses(objects_to_sample = sampled_target_bop_objs,# + sampled_distractor_bop_objs,
                            sample_pose_func = sample_pose_func,
                            max_tries = 1000)

    # Define a function that samples the initial pose of a given object above the ground
    def sample_initial_pose(obj: bproc.types.MeshObject):
        obj.set_location(bproc.sampler.upper_region(objects_to_sample_on=room_planes[0:1],
                                                    min_height=1, max_height=4, face_sample_range=[0.4, 0.6]))
        obj.set_rotation_euler(np.random.uniform([0, 0, 0], [0, 0, np.pi * 2]))

    # Sample objects on the given surface
    placed_objects = bproc.object.sample_poses_on_surface(objects_to_sample=sampled_target_bop_objs,# + sampled_distractor_bop_objs,
                                                          surface=room_planes[0],
                                                          sample_pose_func=sample_initial_pose,
                                                          min_distance=0.01,
                                                          max_distance=0.25,
                                                          max_tries=1000,
                                                          )

    # BVH tree used for camera obstacle checks
    bop_bvh_tree = bproc.object.create_bvh_tree_multi_objects(sampled_target_bop_objs)# + sampled_distractor_bop_objs)

    cam_poses = 0
    while cam_poses < 25:
        # Sample location
        location = bproc.sampler.shell(center = [0, 0, 0],
                                radius_min = 0.35,
                                radius_max = 1.5,
                                elevation_min = 5,
                                elevation_max = 89)
        # Determine point of interest in scene as the object closest to the mean of a subset of objects
        poi = bproc.object.compute_poi(np.random.choice(sampled_target_bop_objs, size=SIZE, replace=False))
        # Compute rotation based on vector going from location towards poi
        rotation_matrix = bproc.camera.rotation_from_forward_vec(poi - location, inplane_rot=np.random.uniform(-0.7854, 0.7854))
        # Add homog cam pose based on location an rotation
        cam2world_matrix = bproc.math.build_transformation_mat(location, rotation_matrix)

        # Check that obstacles are at least 0.3 meter away from the camera and make sure the view interesting enough
        if bproc.camera.perform_obstacle_in_view_check(cam2world_matrix, {"min": 0.3}, bop_bvh_tree):
            # Persist camera pose
            bproc.camera.add_camera_pose(cam2world_matrix, frame=cam_poses)
            cam_poses += 1

    # render the whole pipeline
    data = bproc.renderer.render()
    nocs_data = bproc.renderer.render_nocs()
    bproc.writer.write_hdf5("output_nocs", nocs_data, append_to_existing_output=True)

    # Write data in bop format
    bproc.writer.write_bop(os.path.join(args.output_dir, 'bop_data'),
                           target_objects = sampled_target_bop_objs,
                           dataset = 'lm',
                           depth_scale = 1.0,
                           depths = data["depth"],
                           colors = data["colors"],
                           color_file_format = "JPEG",
                           ignore_dist_thres = 10)

    for obj in (sampled_target_bop_objs):# + sampled_distractor_bop_objs):
        obj.hide(True)
プログラムの説明は後にします。まずはプログラムを実行します。
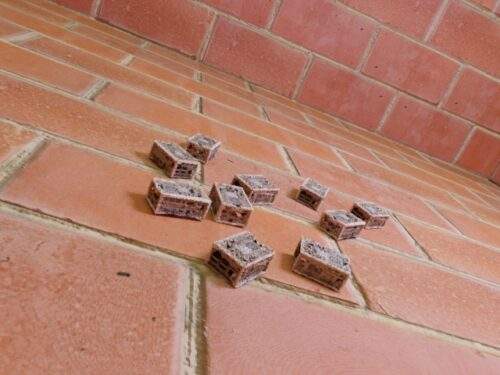
blenderproc run BlenderProc/examples/datasets/bop_challenge/main_lm_uprightcustom.py models_obj/ cc_textures/ output_data --num_scenes=2上記を実行すると、長い計算が終了した後、output_data フォルダが作成されます。
次回のために、output_data/bop_data/lm/models_objにobj_000001.obj,mtl,plyをコピーしておいてください。
参考までにこんな画像が出来上がります。
プログラムの説明
BlenderProc/examples/datasets/bop_challenge/main_lm_uprightcustom.py を説明していきます。
基本的な説明はこちらにあります。
import blenderproc as bproc
import argparse
import os
import numpy as np

parser = argparse.ArgumentParser()
parser.add_argument('bop_parent_path', help="Path to the bop datasets parent directory")
parser.add_argument('cc_textures_path', default="resources/cctextures", help="Path to downloaded cc textures")
parser.add_argument('output_dir', help="Path to where the final files will be saved ")
parser.add_argument('--num_scenes', type=int, default=200, help="How many scenes with 25 images each to generate")
args = parser.parse_args()
parser で各種引数を設定します。
- bop_parent_path … bop データの場所。今回は models_obj フォルダ
- cc_textures_path … blenderproc でダウンロードした cc_texture フォルダ
- output_dir … 任意のフォルダを指定可能。今回は output_data フォルダ
- –num_scenes … 出力するシーンの数。今回は 2種類(各25枚)のシーンを出力
bproc.init()

SIZE=10

# load bop objects into the scene
target_bop_objs = bproc.loader.load_bop_objs(bop_dataset_path = os.path.join(args.bop_parent_path, 'lm'), mm2m=True,
                                            num_of_objs_to_sample=SIZE, obj_ids=[1, 1, 1, 1, 1, 1, 1, 1, 1, 1])
blenderproc のシミュレーションを初期化してから作業を始めます。
SIZE = 10 は、1シーンに登場するワークの数を指定します。今回は10個のワークを配置します。
bproc.loader.load_bop_objs() は、BOPのデータセットを読み込むための関数です。
各引数は以下の通りです。
- bop_dataset_path = os.path.join(args.bop_parent_path, ‘lm’) … データセットのパスを指定
- mm2m=True … 単位を mm から m に変換するかどうか指定
- num_of_objs_to_sample=SIZE … 配置する物体の数を指定します。
- obj_ids … 1を指定した場合は、ファイル名 obj_000001.ply を読み込みます。
# load BOP datset intrinsics
bproc.loader.load_bop_intrinsics(bop_dataset_path = os.path.join(args.bop_parent_path, 'lm'))

# set shading and hide objects
for obj in (target_bop_objs):# + tless_dist_bop_objs + ycbv_dist_bop_objs + tyol_dist_bop_objs):
    obj.set_shading_mode('auto')
    obj.hide(True)
bproc.loader.load_bop_intrinsics は、models_obj/lm/camera.json からカメラパラメーターを読み込みます。
target_bop_objs は読み込んだモデルが含まれるリストです。
影を自動で適用・初期状態は物体を隠します。
# create room
room_planes = [bproc.object.create_primitive('PLANE', scale=[2, 2, 1]),
               bproc.object.create_primitive('PLANE', scale=[2, 2, 1], location=[0, -2, 2], rotation=[-1.570796, 0, 0]),
               bproc.object.create_primitive('PLANE', scale=[2, 2, 1], location=[0, 2, 2], rotation=[1.570796, 0, 0]),
               bproc.object.create_primitive('PLANE', scale=[2, 2, 1], location=[2, 0, 2], rotation=[0, -1.570796, 0]),
               bproc.object.create_primitive('PLANE', scale=[2, 2, 1], location=[-2, 0, 2], rotation=[0, 1.570796, 0])]
シミュレーションを行う部屋を作成します。
単位は m で指定しますので、2m x 2mの高さ1mの部屋を5個結合して作成しています。
公式説明によると、2m x 2m x 2m の空間になるみたいです…
# sample light color and strenght from ceiling
light_plane = bproc.object.create_primitive('PLANE', scale=[3, 3, 1], location=[0, 0, 10])
light_plane.set_name('light_plane')
light_plane_material = bproc.material.create('light_material')
照明を設置するための平面を作成し、照明を設置します。
# sample point light on shell
light_point = bproc.types.Light()
light_point.set_energy(200)
照明のインスタンスを作成し、明るさ200を指定します。
# load cc_textures
cc_textures = bproc.loader.load_ccmaterials(args.cc_textures_path)
平面に適用するためのテクスチャを cc_texture フォルダから読み込みます。
# Define a function that samples 6-DoF poses
def sample_pose_func(obj: bproc.types.MeshObject):
    min = np.random.uniform([-0.3, -0.3, 0.0], [-0.2, -0.2, 0.0])
    max = np.random.uniform([0.2, 0.2, 0.4], [0.3, 0.3, 0.6])
    obj.set_location(np.random.uniform(min, max))
    obj.set_rotation_euler(bproc.sampler.uniformSO3())
後で使用する関数を定義します。
メッシュオブジェクトに対して、位置・回転をランダムに与える関数です。
# activate depth rendering without antialiasing and set amount of samples for color rendering
bproc.renderer.enable_depth_output(activate_antialiasing=False)
bproc.renderer.set_max_amount_of_samples(100)
bproc.renderer.enable_depth_output は、最後にレンダリングする際に、深度マップを出力するための関数です。
set_max_amount_of_samples は、同様にいくつのオブジェクトを出力するかを指定します。
for i in range(args.num_scenes):引数で与えたシーンの数に対して for ループを実行します。今回は2です。
# Sample bop objects for a scene
sampled_target_bop_objs = list(np.random.choice(target_bop_objs, size=SIZE, replace=False))
オブジェクトのリストからランダムな順番でターゲットを取り出します。
# Randomize materials and set physics
for obj in (sampled_target_bop_objs):# + sampled_distractor_bop_objs):
    mat = obj.get_materials()[0]
    if obj.get_cp("bop_dataset_name") in ['itodd', 'tless']:
        grey_col = np.random.uniform(0.1, 0.9)
        mat.set_principled_shader_value("Base Color", [grey_col, grey_col, grey_col, 1])
    mat.set_principled_shader_value("Roughness", np.random.uniform(0, 1.0))
    mat.set_principled_shader_value("Specular", np.random.uniform(0, 1.0))
    obj.hide(False)
取り出したターゲットのリストに対してforループを実行します。
データセットは Linemod なので、if 文は実行されません。
mat.set_principled_shader_value では、
- Roughness … 表面粗さ
- Specular … 鏡面反射度
を 0 – 1 の一様分布からランダムサンプリングします。
その後、オブジェクトを非表示から表示へ切り替えます。
# Sample two light sources
light_plane_material.make_emissive(emission_strength=np.random.uniform(3,6),
                                    emission_color=np.random.uniform([0.5, 0.5, 0.5, 1.0], [1.0, 1.0, 1.0, 1.0]))
light_plane.replace_materials(light_plane_material)
light_point.set_color(np.random.uniform([0.5,0.5,0.5],[1,1,1]))
location = bproc.sampler.shell(center = [0, 0, 0], radius_min = 1, radius_max = 1.5,
                            elevation_min = 5, elevation_max = 89)
light_point.set_location(location)
続いて、照明の設定を行います。
- light_plane_material.make_emissive … マテリアルを発光させます。
- light_plane.replace_materials … マテリアルを指定したオブジェクトに置換
- light_point.set_color … ライトの色を設定
- bproc.sampler.shell … 指定したサイズの球から位置をサンプリング
- light_point.set_location … light_point の位置を指定
# sample CC Texture and assign to room planes
random_cc_texture = np.random.choice(cc_textures)
for plane in room_planes:
    plane.replace_materials(random_cc_texture)
平面を指定したテクスチャに置換します。
# Sample object poses and check collisions
bproc.object.sample_poses(objects_to_sample = sampled_target_bop_objs,# + sampled_distractor_bop_objs,
                            sample_pose_func = sample_pose_func,
                            max_tries = 1000)
シミュレーター上のオブジェクトの姿勢をランダムサンプリングします。
衝突がある場合は、再トライします。
# Define a function that samples the initial pose of a given object above the ground
def sample_initial_pose(obj: bproc.types.MeshObject):
    obj.set_location(bproc.sampler.upper_region(objects_to_sample_on=room_planes[0:1],
                                                    min_height=1, max_height=4, face_sample_range=[0.4, 0.6]))
    obj.set_rotation_euler(np.random.uniform([0, 0, 0], [0, 0, np.pi * 2]))
初期姿勢を出力する関数です。
# Sample objects on the given surface
placed_objects = bproc.object.sample_poses_on_surface(objects_to_sample=sampled_target_bop_objs,# + sampled_distractor_bop_objs,
                                                      surface=room_planes[0],
                                                      sample_pose_func=sample_initial_pose,
                                                      min_distance=0.01,
                                                      max_distance=0.25,
                                                      max_tries=1000,
)bproc.object.sample_poses_on_surfaceで、指定した表面上にランダムにオブジェクトを配置します。
# BVH tree used for camera obstacle checks
bop_bvh_tree = bproc.object.create_bvh_tree_multi_objects(sampled_target_bop_objs)# + sampled_distractor_bop_objs)bproc.object.create_bvh_tree_multi_objectsで、複数のメッシュ オブジェクトを含む BVH ツリーを作成します。
BVHツリーとは、衝突判定に使用するバウンディングボックスみたいです。
cam_poses = 0
while cam_poses < 25:
    # Sample location
    location = bproc.sampler.shell(center = [0, 0, 0],
                                radius_min = 0.35,
                                radius_max = 1.5,
                                elevation_min = 5,
                                elevation_max = 89)
    # Determine point of interest in scene as the object closest to the mean of a subset of objects
    poi = bproc.object.compute_poi(np.random.choice(sampled_target_bop_objs, size=SIZE, replace=False))
    # Compute rotation based on vector going from location towards poi
    rotation_matrix = bproc.camera.rotation_from_forward_vec(poi - location, inplane_rot=np.random.uniform(-0.7854, 0.7854))
    # Add homog cam pose based on location an rotation
    cam2world_matrix = bproc.math.build_transformation_mat(location, rotation_matrix)

    # Check that obstacles are at least 0.3 meter away from the camera and make sure the view interesting enough
    if bproc.camera.perform_obstacle_in_view_check(cam2world_matrix, {"min": 0.3}, bop_bvh_tree):
        # Persist camera pose
        bproc.camera.add_camera_pose(cam2world_matrix, frame=cam_poses)
        cam_poses += 1
cam_poses は最大25ショット撮影します。この数値を変更すると、ショット数が増えます。
まず、location = bproc.sampler.shell で、ランダムに位置をサンプリングします。
bproc.object.compute_poiで、オブジェクトシーンの注目点を指定します。
bproc.camera.rotation_from_forward_vecで、指定されたベクトルへ注目するカメラの回転行列を取得します。
bproc.math.build_transformation_matで、移動部分と回転部分から変換行列を構築します。
最後に、bproc.camera.perform_obstacle_in_view_checkで、障害物が近すぎる・遠すぎるを確認します。
問題なければ、bproc.camera.add_camera_poseでカメラ姿勢を追加します。
# render the whole pipeline
data = bproc.renderer.render()
nocs_data = bproc.renderer.render_nocs()
bproc.writer.write_hdf5("output_nocs", nocs_data, append_to_existing_output=True)
data = bproc.renderer.render()で、今までの条件をまとめてレンダリングします。
また、CenterSnap は NOCS データが必要なので、各シーンをNOCS形式でも出力しておきます。
# Write data in bop format
bproc.writer.write_bop(os.path.join(args.output_dir, 'bop_data'),
                           target_objects = sampled_target_bop_objs,
                           dataset = 'lm',
                           depth_scale = 1.0,
                           depths = data["depth"],
                           colors = data["colors"],
                           color_file_format = "JPEG",
                           ignore_dist_thres = 10)

for obj in (sampled_target_bop_objs):# + sampled_distractor_bop_objs):
    obj.hide(True)
bproc.writer.write_bop で、今までのシミュレーション条件下でレンダリングします。また、その結果を bop_data フォルダに保存します。
完了したら、オブジェクトを非表示にして終了です。
おわりに
今回はここまでとします。
bproc は日本語サイトがなく、使い方が難しいので習得に時間がかかると思います。
そんなことをしなくても、既存のデータセット形式であればテンプレートがあるので特に困ることはないかなと思います。
次回は bop_toolkit を用いてレンダリングの結果を更に編集していきます。


コメント