はじめに
前回は、3D-ResNets-PyTorch の推論プログラムについて説明しました。

今回はデータローダを解析していきます。
github はこちらです。
前提条件
前提条件は以下の通りです。
- Python3.9
- torch == 1.13.0+cu117, torchvision == 0.14.0+cu117
- 作業は WSL2 で実施します
データローダーの inputs, targets について
inference_custom.py の 39 行目
for i, (inputs, targets) in enumerate(data_loader):こちらの中身を
print(len(inputs), len(targets), len(inputs[0]), len(targets[0]), inputs[0][0].shape, inputs[0][1].shape, inputs[0][2].shape, targets[0][0], targets[0][1]) で確認していきます。
11 11 3 2 torch.Size([16, 112, 112]) torch.Size([16, 112, 112]) torch.Size([16, 112, 112]) v_ApplyEyeMakeup_g01_c01 [1, 17]torch.Size([16, 112, 112]) は 112×112 の画像が 16枚 格納されています。
なので、v_ApplyEyeMakeup_g01_c01 の画像は
11 * 16 = 176 枚あることになりますが、実際には 166枚です。
そうなると、最終フレームの枚数は中途半端となるはずですが、temporal_transform で整理されます。
targets[0][1] に何枚目の画像かが格納されています。
次に inputs の中身を確認していきます。
inference_custom.py の 40 行目以降に以下を追加してください。
for i, (inputs, targets) in enumerate(data_loader):
    # print(len(inputs), len(targets), len(inputs[0]), len(targets[0]), inputs[-1][0].shape, inputs[-1][1].shape, inputs[-1][2].shape, targets[-1][0], targets[-1][1])
    data_time.update(time.time() - end_time)

    for i, j, k in zip(inputs[0][0], inputs[0][1], inputs[0][2]):
        ii = i.cpu().detach().numpy()
        jj = j.cpu().detach().numpy()
        kk = k.cpu().detach().numpy()
        cv2.imshow("input1", ii)
        cv2.imshow("input2", jj)
        cv2.imshow("input3", kk)
        cv2.waitKey(100)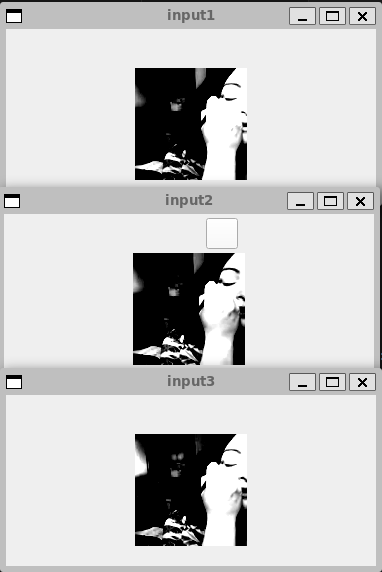
上記のような画像が表示されます。すべて同じ画像です。
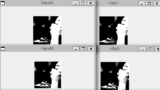
もう少しフレームを進めていくと各 input の差が分かります。
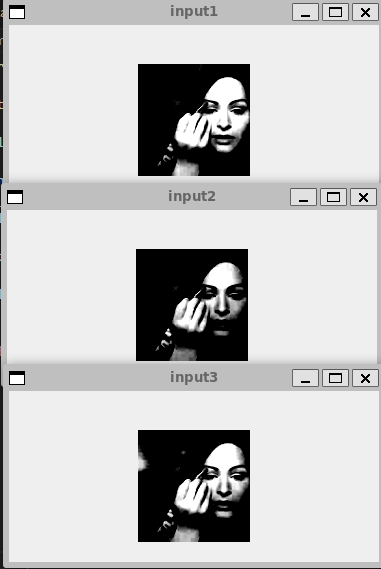
これは、spatial_transform で前処理を実行している結果となります。
ここまでが、AIモデルの入力に必要な inputs, targets の説明となります。
temporal_transform, spatial_transform について
temporal_transform, spatial_transform の内容は main_inference.py の 253行目 get_inference_utils 関数に記載されています。
各種 Transform に投げる Transoform を見ていく前に、spatial_transform の中身を確認します。
temporal_transform は フレーム数の管理を実施する前処理となります。
spatial_transform
Compose(
    Resize(size=112, interpolation=bilinear, max_size=None, antialias=None)
    CenterCrop(size=(112, 112))
    ToTensor()
    <spatial_transforms.ScaleValue object at 0x7fea4fed7b20>
    Normalize(mean=[0.4345, 0.4051, 0.3775], std=[0.2768, 0.2713, 0.2737])
)
112 にリサイズして 正方形になるように切り出す前処理となります。
なので、spatial_transform に投げるデータはリサイズする必要はないのと、PIL で投げる必要があります。
入力データについて
入力データについて確認していきます。
dataset.py の 125行目 get_inference_data 関数の 177行目 VideoDatasetMultiClips がデータローダーを作成する部分になります。
VideoDatasetMultiClips は、datasets/videodataset_multiclips.py から import されています。
datasets/videodataset_multiclips.py
import json
import copy
import functools

import torch
from torch.utils.data.dataloader import default_collate

from .videodataset import VideoDataset


def collate_fn(batch):
    batch_clips, batch_targets = zip(*batch)

    batch_clips = [clip for multi_clips in batch_clips for clip in multi_clips]
    batch_targets = [
        target for multi_targets in batch_targets for target in multi_targets
    ]

    target_element = batch_targets[0]
    if isinstance(target_element, int) or isinstance(target_element, str):
        return default_collate(batch_clips), default_collate(batch_targets)
    else:
        return default_collate(batch_clips), batch_targets


class VideoDatasetMultiClips(VideoDataset):

    def __loading(self, path, video_frame_indices):
        clips = []
        segments = []
        for clip_frame_indices in video_frame_indices:
            clip = self.loader(path, clip_frame_indices)
            if self.spatial_transform is not None:
                self.spatial_transform.randomize_parameters()
                clip = [self.spatial_transform(img) for img in clip]
            clips.append(torch.stack(clip, 0).permute(1, 0, 2, 3))
            segments.append(
                [min(clip_frame_indices),
                 max(clip_frame_indices) + 1])

        return clips, segments

    def __getitem__(self, index):
        path = self.data[index]['video']

        video_frame_indices = self.data[index]['frame_indices']
        if self.temporal_transform is not None:
            video_frame_indices = self.temporal_transform(video_frame_indices)

        clips, segments = self.__loading(path, video_frame_indices)

        if isinstance(self.target_type, list):
            target = [self.data[index][t] for t in self.target_type]
        else:
            target = self.data[index][self.target_type]

        if 'segment' in self.target_type:
            if isinstance(self.target_type, list):
                segment_index = self.target_type.index('segment')
                targets = []
                for s in segments:
                    targets.append(copy.deepcopy(target))
                    targets[-1][segment_index] = s
            else:
                targets = segments
        else:
            targets = [target for _ in range(len(segments))]

        return clips, targets
こちらを解析していけば、入力データの要件が満たせそうです。
target の transform
まずは 46 – 48 行目の video_frame_indices を見ていきます。
video_frame_indices = self.data[index]['frame_indices']
if self.temporal_transform is not None:
    video_frame_indices = self.temporal_transform(video_frame_indices)
↓
print(video_frame_indices)
if self.temporal_transform is not None:
    video_frame_indices = self.temporal_transform(video_frame_indices)
print(video_frame_indices)
出力は以下のようになります。
[1, 2, 3, 4, 5, 6, 7, 8, 9, 10, 11, 12, 13, 14, 15, 16, 17, 18, 19, 20, 21, 22, 23, 24, 25, 26, 27, 28, 29, 30, 31, 32, 33, 34, 35, 36, 37, 38, 39, 40, 41, 42, 43, 44, 45, 46, 47, 48, 49, 50, 51, 52, 53, 54, 55, 56, 57, 58, 59, 60, 61, 62, 63, 64, 65, 66, 67, 68, 69, 70, 71, 72, 73, 74, 75, 76, 77, 78, 79, 80, 81, 82, 83, 84, 85, 86, 87, 88, 89, 90, 91, 92, 93, 94, 95, 96, 97, 98, 99, 100, 101, 102, 103, 104, 105, 106, 107, 108, 109, 110, 111, 112, 113, 114, 115, 116, 117, 118, 119, 120, 121, 122, 123, 124, 125, 126, 127, 128, 129, 130, 131, 132, 133, 134, 135, 136, 137, 138, 139, 140, 141, 142, 143, 144, 145, 146, 147, 148, 149, 150, 151, 152, 153, 154, 155, 156, 157, 158, 159, 160, 161, 162, 163, 164, 165]

[[1, 2, 3, 4, 5, 6, 7, 8, 9, 10, 11, 12, 13, 14, 15, 16], [17, 18, 19, 20, 21, 22, 23, 24, 25, 26, 27, 28, 29, 30, 31, 32], [33, 34, 35, 36, 37, 38, 39, 40, 41, 42, 43, 44, 45, 46, 47, 48], [49, 50, 51, 52, 53, 54, 55, 56, 57, 58, 59, 60, 61, 62, 63, 64], [65, 66, 67, 68, 69, 70, 71, 72, 73, 74, 75, 76, 77, 78, 79, 80], [81, 82, 83, 84, 85, 86, 87, 88, 89, 90, 91, 92, 93, 94, 95, 96], [97, 98, 99, 100, 101, 102, 103, 104, 105, 106, 107, 108, 109, 110, 111, 112], [113, 114, 115, 116, 117, 118, 119, 120, 121, 122, 123, 124, 125, 126, 127, 128], [129, 130, 131, 132, 133, 134, 135, 136, 137, 138, 139, 140, 141, 142, 143, 144], [145, 146, 147, 148, 149, 150, 151, 152, 153, 154, 155, 156, 157, 158, 159, 160], [161, 162, 163, 164, 165, 161, 162, 163, 164, 165, 161, 162, 163, 164, 165, 161]]
16 フレーム毎の index に変換してくれるのが temporal_transform となります。
clip の transform
次に __loading 関数を見ていきます。
画像を読み込む部分は __loading 関数の以下の部分です。
for clip_frame_indices in video_frame_indices:
    clip = self.loader(path, clip_frame_indices)
self.loader は datasets/loader.py にあります。
import io

import h5py
from PIL import Image


class ImageLoaderPIL(object):

    def __call__(self, path):
        # open path as file to avoid ResourceWarning (https://github.com/python-pillow/Pillow/issues/835)
        with path.open('rb') as f:
            with Image.open(f) as img:
                return img.convert('RGB')


class ImageLoaderAccImage(object):

    def __call__(self, path):
        import accimage
        return accimage.Image(str(path))


class VideoLoader(object):

    def __init__(self, image_name_formatter, image_loader=None):
        self.image_name_formatter = image_name_formatter
        if image_loader is None:
            self.image_loader = ImageLoaderPIL()
        else:
            self.image_loader = image_loader

    def __call__(self, video_path, frame_indices):
        video = []
        for i in frame_indices:
            image_path = video_path / self.image_name_formatter(i)
            if image_path.exists():
                video.append(self.image_loader(image_path))

        return video


class VideoLoaderHDF5(object):

    def __call__(self, video_path, frame_indices):
        with h5py.File(video_path, 'r') as f:
            video_data = f['video']

            video = []
            for i in frame_indices:
                if i < len(video_data):
                    video.append(Image.open(io.BytesIO(video_data[i])))
                else:
                    return video

        return video


class VideoLoaderFlowHDF5(object):

    def __init__(self):
        self.flows = ['u', 'v']

    def __call__(self, video_path, frame_indices):
        with h5py.File(video_path, 'r') as f:

            flow_data = []
            for flow in self.flows:
                flow_data.append(f[f'video_{flow}'])

            video = []
            for i in frame_indices:
                if i < len(flow_data[0]):
                    frame = [
                        Image.open(io.BytesIO(video_data[i]))
                        for video_data in flow_data
                    ]
                    frame.append(frame[-1])  # add dummy data into third channel
                    video.append(Image.merge('RGB', frame))

        return video
この中の、VideoLoader と ImageLoaderPIL が今回の self.loader に該当します。
画像の読込は
class ImageLoaderPIL(object):

    def __call__(self, path):
        # open path as file to avoid ResourceWarning (https://github.com/python-pillow/Pillow/issues/835)
        with path.open('rb') as f:
            print(f)
            with Image.open(f) as img:
                return img.convert('RGB')
画像を16フレーム分まとめるのは
class VideoLoader(object):

    def __init__(self, image_name_formatter, image_loader=None):
        self.image_name_formatter = image_name_formatter
        if image_loader is None:
            self.image_loader = ImageLoaderPIL()
        else:
            self.image_loader = image_loader

    def __call__(self, video_path, frame_indices):
        video = []
        for i in frame_indices:
            image_path = video_path / self.image_name_formatter(i)
            if image_path.exists():
                video.append(self.image_loader(image_path))

        return video
となります。
投入する画像は (カテゴリ名)/image_(フレーム番号).jpg の指定があります。
あとは無理やり 16枚読み込んで、モデルに投げる作業が必要となります。
おわりに
今回はここまでとします。
次回は、入力データを作成して、結果を確認するまでのプログラムを作成していきます。
コメント