
はじめに
前回は TimeSformer について説明しました。(中途半端ですみません…。)

今回は 動画から複数枚の画像を切り出して動作認識を行う 3D-ResNets-PyTorch について説明します。
github はこちらです。
前提条件
前提条件は以下の通りです。
- FFmpeg が使用できること ( Linux でも Windows でも可 )
- Python3.9
- torch == 1.13.0+cu117, torchvision == 0.14.0+cu117
UCF101 のダウンロード
こちらの公式サイトからダウンロードできます。
今回は UCF101 データセットを使用して学習させていきます。
下記画像の青線部分からダウンロード可能です。

UCF101 動画データを画像データに変換
mkdir video-recog
cd video-recog
mkdir UCF101_images
mkdir UCF101_json
git clone https://github.com/kenshohara/3D-ResNets-PyTorch
cd 3D-ResNets-PyTorch
今作成した video-recog フォルダに解凍した UCF101_videos を移動しておいてください。
また、UCF101_videos フォルダに
- classInd.txt
- testlist01.txt
- testlist02.txt
- testlist03.txt
- trainlist01.txt
- trainlist02.txt
- trainlist03.txt
を移動しておいてください。
以下のコマンドで動画データから画像データへの変換を実施します。
python3 -m util_scripts.generate_video_jpgs ../UCF101_videos ../UCF101_images ucf101UCF101_images/UCF101 に画像が保存されました。
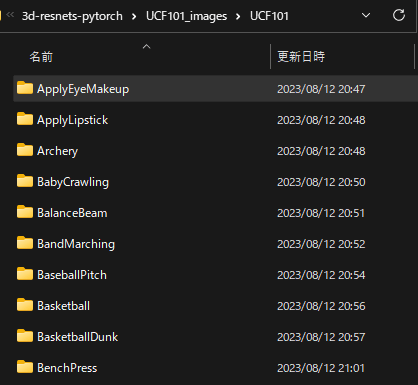
ここで UCF101_images/UCF101 を確認すると、v_ApplyEyeMakeup_g01_c01 といったフォルダ名が並んでいます。
一つの動画につき一つのフォルダが作成されます。
これをカテゴリ毎のフォルダにまとめていきます。
v_ApplyEyeMakeup_g01_c01であれば、
UCF101_images/UCF101/ApplyEyeMakeup/v_ApplyEyeMakeup_g01_c01 …
といったような構成にしてください。
手作業では面倒だったので、今回は
上記 10 カテゴリにしました。
testlist, trainlist, classInd の編集
classInd.txt
1 ApplyEyeMakeup
2 ApplyLipstick
3 Archery
4 BabyCrawling
5 BalanceBeam
6 BandMarching
7 BaseballPitch
8 Basketball
9 BasketballDunk
10 BenchPress
testlist01.txt, testlist02.txt, testlist03.txt, trainlist01.txt, trainlist02.txt, trainlist03.txt は上記カテゴリに該当するパスのみ残してください。
準備ができたら、下記コマンドを実行してください。
python3 -m util_scripts.ucf101_json ../UCF101_images/ ../UCF101_images/UCF101/ ../UCF101_json/UCF101_json フォルダに
- ucf101_01.json
- ucf101_02.json
- ucf101_03.json
が作成されました。
学習
ようやく、学習に入ります。
まず、spatial_transforms.py の Scale クラスをコメントアウトします。
class Scale(transforms.Scale):

    def randomize_parameters(self):
        pass
↓
#class Scale(transforms.Scale):

#    def randomize_parameters(self):
#        pass
学習コマンドは以下です。
python3 main.py --root_path ./ --video_path ../UCF101_images/UCF101 --annotation_path ../UCF101_json/ucf101_01.json --result_path results --dataset ucf101 --model resnet --model_depth 50 --n_classes 10 --batch_size 4 --n_threads 4 --checkpoint 5以下のようなログがターミナルに出力されます。
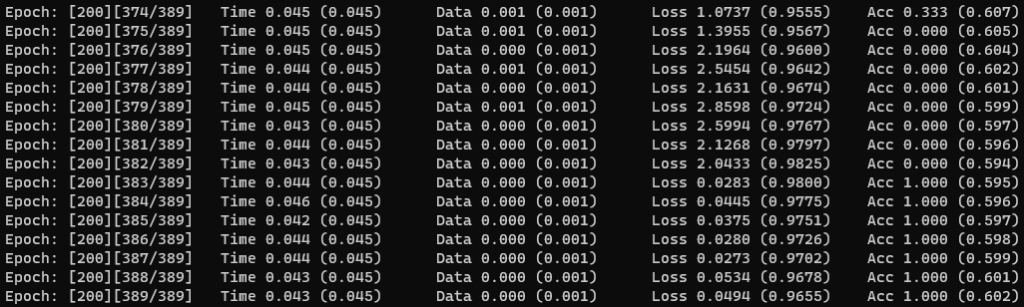
200 epoch で完了です。
results フォルダに save_200.pth が作成されます。
結果確認
結果は以下のコマンドで確認できます。
python3 main.py --root_path ./ --video_path ../UCF101_images/UCF101 --annotation_path ../UCF101_json/ucf101_01.json --result_path results --dataset ucf101 --resume_path results/save_200.pth --model_depth 50 --n_classes 10 --n_threads 4 --no_train --no_val --inference --output_topk 1 --inference_batch_size 1results / val.json に結果が保存されます。
{"results":
  {"v_ApplyEyeMakeup_g01_c01":
    [{"label": "ApplyLipstick",
      "score": 0.8919045925140381}],
   "v_ApplyEyeMakeup_g01_c02":
    [{"label": "ApplyLipstick",
      "score": 0.8710216879844666}],
   "v_ApplyEyeMakeup_g01_c03":
     [{"label": "ApplyLipstick",
       "score": 0.8302245140075684}],
問題なく検出できていそうです。
おわりに
今回は 3D-ResNets-PyTorch について学習 ~ 結果確認までを説明しました。
学習結果・検出結果ともに良好です。
次回は推論プログラムについて説明できればと思います。
コメント