
はじめに
今までは、学習が必要なセグメンテーション (Detectron2, yolact-edge) について説明してきました。
今回は学習不要でセグメンテーション可能な segment-anything について説明します。
前提条件
前提条件は以下の通りです。
- Python == 3.9.13
- torch == 1.12.1
- torchvision == 0.13.1
GPU は無くても問題ありません。使用する場合は8GB 以上必要となります。
cpu 推論:0.13s
segment-anything の github はこちらにあります。
環境構築
以下のコマンドで必要なライブラリをインストールできます。
pip install git+https://github.com/facebookresearch/segment-anything.gitモデルのダウンロード
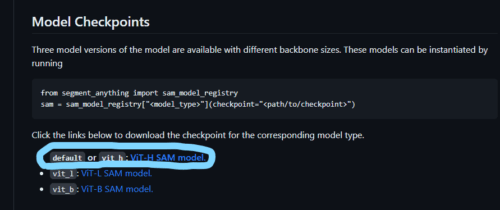
モデルをダウンロードします。
ページ中腹の以下の青丸のリンクからモデルをダウンロードしてください。約 2.4 GB あります。
画像の準備
今回は以下の画像を使用します。名称は sample_image.png とします。
MVTec-AD の cable 画像を使用します。
MVTec-AD のページはこちらです。
推論プログラム
inference.py を用意します。
import numpy as np
import torch
import matplotlib.pyplot as plt
import cv2
import time
def show_mask(mask, ax, random_color=False):
if random_color:
color = np.concatenate([np.random.random(3), np.array([0.6])], axis=0)
else:
color = np.array([30/255, 144/255, 255/255, 0.6])
h, w = mask.shape[-2:]
mask_image = mask.reshape(h, w, 1) * color.reshape(1, 1, -1)
ax.imshow(mask_image)
def show_points(coords, labels, ax, marker_size=375):
pos_points = coords[labels==1]
neg_points = coords[labels==0]
ax.scatter(pos_points[:, 0], pos_points[:, 1], color='green', marker='*', s=marker_size, edgecolor='white', linewidth=1.25)
ax.scatter(neg_points[:, 0], neg_points[:, 1], color='red', marker='*', s=marker_size, edgecolor='white', linewidth=1.25)
def show_box(box, ax):
x0, y0 = box[0], box[1]
w, h = box[2] - box[0], box[3] - box[1]
ax.add_patch(plt.Rectangle((x0, y0), w, h, edgecolor='green', facecolor=(0,0,0,0), lw=2))
if __name__ == "__main__":
image = cv2.imread('images/sample_image.png')
image = cv2.cvtColor(image, cv2.COLOR_BGR2RGB)
import sys
sys.path.append("..")
from segment_anything import sam_model_registry, SamPredictor
sam_checkpoint = "./weights/sam_vit_h_4b8939.pth"
model_type = "vit_h"
device = "cpu"
sam = sam_model_registry[model_type](checkpoint=sam_checkpoint)
sam.to(device=device)
predictor = SamPredictor(sam)
predictor.set_image(image)
input_point = np.array([[600, 600]])
input_label = np.array([1])
plt.figure(figsize=(10,10))
plt.imshow(image)
show_points(input_point, input_label, plt.gca())
plt.axis('on')
plt.show()
start = time.time()
masks, scores, logits = predictor.predict(
point_coords=input_point,
point_labels=input_label,
multimask_output=True,
)
print(time.time() - start)
print("mask shape: ", masks.shape)
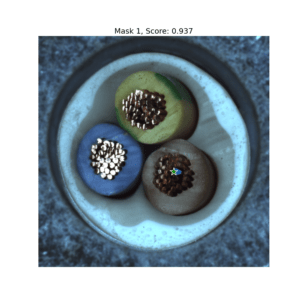
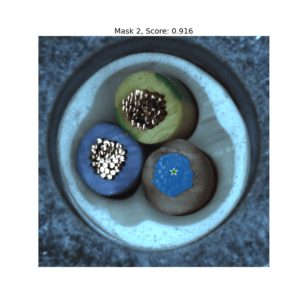
for i, (mask, score) in enumerate(zip(masks, scores)):
plt.figure(figsize=(10,10))
plt.imshow(image)
show_mask(mask, plt.gca())
show_points(input_point, input_label, plt.gca())
plt.title(f"Mask {i+1}, Score: {score:.3f}", fontsize=18)
plt.axis('off')
plt.show()
input_point = np.array([[600, 600], [700, 600]])
input_label = np.array([1, 1])
mask_input = logits[np.argmax(scores), :, :] # Choose the model's best mask
masks, _, _ = predictor.predict(
point_coords=input_point,
point_labels=input_label,
mask_input=mask_input[None, :, :],
multimask_output=False,
)
print("mask shape: ", masks.shape)
plt.figure(figsize=(10,10))
plt.imshow(image)
show_mask(masks, plt.gca())
show_points(input_point, input_label, plt.gca())
plt.axis('off')
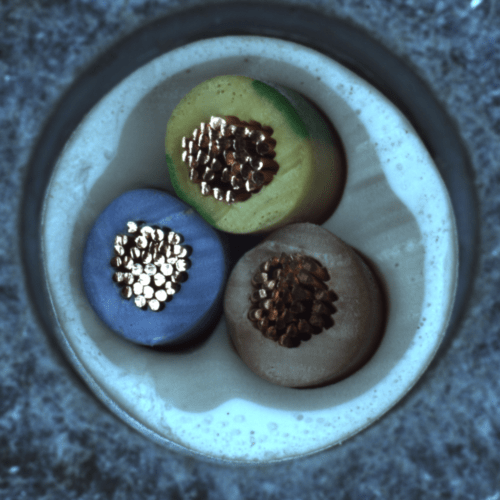
plt.show()上記を実行すると、以下の出力が得られます。

セグメンテーションは上手くできています。
プログラムの説明
プログラムの説明をしていきます。
if __name__ == "__main__":
    image = cv2.imread('images/sample_image.png')
    image = cv2.cvtColor(image, cv2.COLOR_BGR2RGB)

    import sys
    sys.path.append("..")
    from segment_anything import sam_model_registry, SamPredictor

    sam_checkpoint = "./weights/sam_vit_h_4b8939.pth"
    model_type = "vit_h"

    device = "cpu"

    sam = sam_model_registry[model_type](checkpoint=sam_checkpoint)
    sam.to(device=device)
AI モデルと 画像を読み込みます。device = “cuda” とすると、GPU で推論が可能です。
predictor = SamPredictor(sam)

predictor.set_image(image)
SamPredictor インスタンスを作成し、インスタンスに画像を渡します。
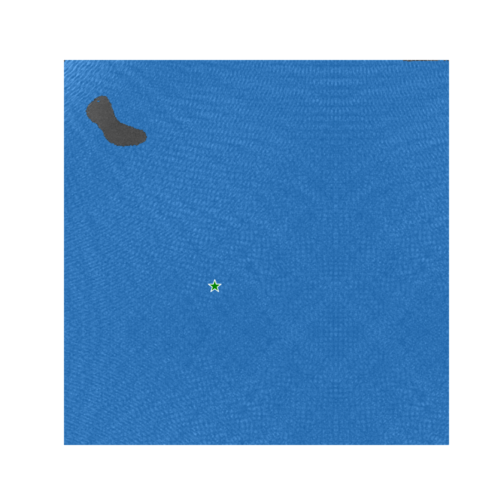
input_point = np.array([[600, 600]])
input_label = np.array([1])
input_point はセグメントしてほしい箇所を指定します。今回は x=600, y=600 です。
input_label は セグメントしてほしい箇所ごとに設定します。背景=0, 前景=1 です。
plt.figure(figsize=(10,10))
plt.imshow(image)
show_points(input_point, input_label, plt.gca())
plt.axis('on')
plt.show()
画像を表示します。
masks, scores, logits = predictor.predict(
    point_coords=input_point,
    point_labels=input_label,
    multimask_output=True,
)
推論部分となります。multimask_output=True で 3つのマスク、False で 1つのマスクを返します。
for i, (mask, score) in enumerate(zip(masks, scores)):
    plt.figure(figsize=(10,10))
    plt.imshow(image)
    show_mask(mask, plt.gca())
    show_points(input_point, input_label, plt.gca())
    plt.title(f"Mask {i+1}, Score: {score:.3f}", fontsize=18)
    plt.axis('off')
    plt.show()
3つのマスクに関してそれぞれ画像とスコアを表示します。
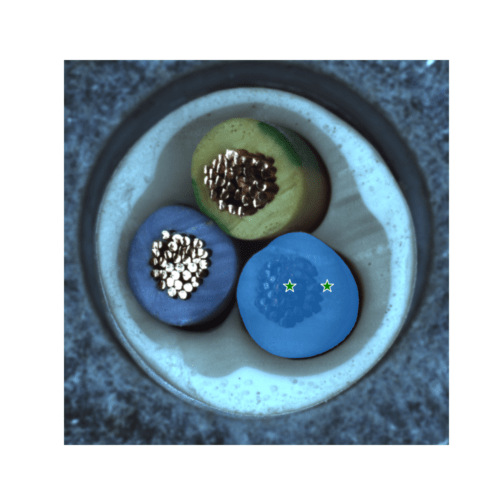
input_point = np.array([[600, 600], [700, 600]])
input_label = np.array([1, 1])
mask_input = logits[np.argmax(scores), :, :]  # Choose the model's best mask

masks, _, _ = predictor.predict(
    point_coords=input_point,
    point_labels=input_label,
    mask_input=mask_input[None, :, :],
    multimask_output=False,
)
今回は (600,600) と (700,600) の2点を前景として指定します。
また、補助用に先ほどの推論結果を mask_input として流用します。
print("mask shape: ", masks.shape)

plt.figure(figsize=(10,10))
plt.imshow(image)
show_mask(masks, plt.gca())
show_points(input_point, input_label, plt.gca())
plt.axis('off')
plt.show()
思い通りにセグメンテーションできました。
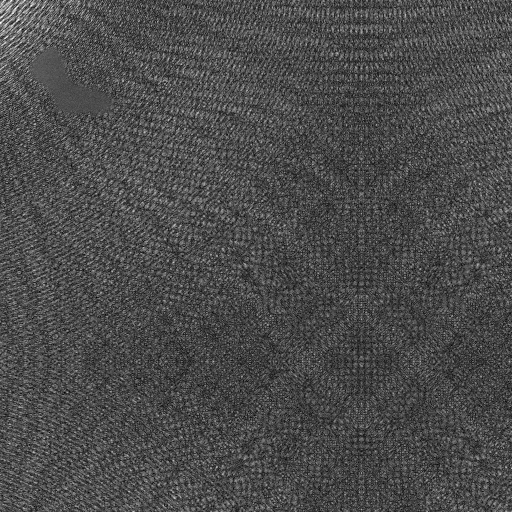
別の画像でセグメンテーションしてみる
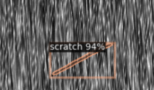
次に、こちらの画像でテストしてみます。
データセットの公式サイトはこちらです。
推論プログラム
import numpy as np
import torch
import matplotlib.pyplot as plt
import cv2
import time

def show_mask(mask, ax, random_color=False):
    if random_color:
        color = np.concatenate([np.random.random(3), np.array([0.6])], axis=0)
    else:
        color = np.array([30/255, 144/255, 255/255, 0.6])
    h, w = mask.shape[-2:]
    mask_image = mask.reshape(h, w, 1) * color.reshape(1, 1, -1)
    ax.imshow(mask_image)

def show_points(coords, labels, ax, marker_size=375):
    pos_points = coords[labels==1]
    neg_points = coords[labels==0]
    ax.scatter(pos_points[:, 0], pos_points[:, 1], color='green', marker='*', s=marker_size, edgecolor='white', linewidth=1.25)
    ax.scatter(neg_points[:, 0], neg_points[:, 1], color='red', marker='*', s=marker_size, edgecolor='white', linewidth=1.25)

def show_box(box, ax):
    x0, y0 = box[0], box[1]
    w, h = box[2] - box[0], box[3] - box[1]
    ax.add_patch(plt.Rectangle((x0, y0), w, h, edgecolor='green', facecolor=(0,0,0,0), lw=2))


if __name__ == "__main__":
    image = cv2.imread('images/sample_image2.png')
    image = cv2.cvtColor(image, cv2.COLOR_BGR2RGB)

    import sys
    sys.path.append("..")
    from segment_anything import sam_model_registry, SamPredictor

    sam_checkpoint = "./weights/sam_vit_h_4b8939.pth"
    model_type = "vit_h"

    device = "cpu"

    sam = sam_model_registry[model_type](checkpoint=sam_checkpoint)
    sam.to(device=device)

    predictor = SamPredictor(sam)

    predictor.set_image(image)


    input_point = np.array([[200, 300]])
    input_label = np.array([1])

    masks, _, _ = predictor.predict(
        point_coords=input_point,
        point_labels=input_label,
        multimask_output=False,
    )

    print("mask shape: ", masks.shape)

    plt.figure(figsize=(10,10))
    plt.imshow(image)
    show_mask(masks, plt.gca())
    show_points(input_point, input_label, plt.gca())
    plt.axis('off')
    plt.show()


    input_point = np.array([[48, 65], [75, 95]])
    input_label = np.array([1, 1])

    masks, _, _ = predictor.predict(
        point_coords=input_point,
        point_labels=input_label,
        multimask_output=False,
    )

    print("mask shape: ", masks.shape)

    plt.figure(figsize=(10,10))
    plt.imshow(image)
    show_mask(masks, plt.gca())
    show_points(input_point, input_label, plt.gca())
    plt.axis('off')
    plt.show()
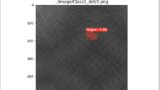
上記を実行すると、以下のような画像が得られます。
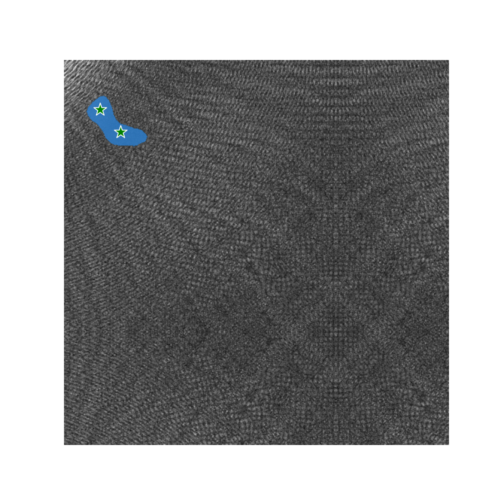
綺麗にセグメンテーションできています!
おわりに
今回は segment-anything について、使い方を説明しました。
このライブラリを使用すれば、学習無しで実践投入できそうです。特に製造現場ではその恩恵が大きいかと思われます。
次回は、segment-anything のもう一つの使い方について説明します。


コメント