
はじめに
前回はコンテキストを使用して、関数・データを受け渡しする方法について説明しました。

今回は、useEffect を使用して UI の描画後に処理を実行する方法について説明します。
前提条件
前提条件は以下の通りです。
- Windows11
- React がインストールされている
- react-create-app を使用してパッケージが作成されている
前回の問題点について
前回はコンテキストを使用して関数の受け渡しを行いました。
コードを再掲します。
TestProvider.js
import React, { createContext, useContext } from 'react'

const TestContext = createContext();
export const useTestContext = () => useContext(TestContext);

export function TestProvider({children}) {
    const alertProvider = () => {
        alert("hello alert");
    }

    const logProvider = (msg) => {
        console.log(msg)
    }

    return (
        <TestContext.Provider value={{alertProvider, logProvider}}>
            {children}
        </TestContext.Provider>
    );
}
App.js
import React from "react";
import { TestProvider } from "./TestProvider.js";
import App2 from "./App2";

export default function testCreateContext() {
  return (
    <>
      <TestProvider>
        <App2 />
      </TestProvider>
    </>
  )
}
App2.js
import React from "react";
import { useTestContext } from "./TestProvider";

function App() {
  const {alertProvider} = useTestContext();
  const {logProvider} = useTestContext();
  alertProvider();
  logProvider("this is log provider");

  const data = [
    {
      name: "Baked Salmon",
      ingredients: [
        { name: "Salmon", amount: 1, measurement: "l lb" },
        { name: "Pine Nuts", amount: 1, measurement: "cup" },
        { name: "Butter Lettuce", amount: 2, measurement: "cups" },
        { name: "Yellow Squash", amount: 1, measurement: "med" },
        { name: "Olive Oil", amount: 0.5, measurement: "cup" },
        { name: "Garlic", amount: 3, measurement: "cloves" },
      ],
      steps: [
        "Preheat the oven to 350 degrees.",
        "Spread the olive oil around a glass baking dish.",
        "Add the salmon, garlic, and pine nuts to the dish.",
        "Bake for 15 minutes.",
        "Add the yellow squash and put back in the oven for 30 mins.",
        "Remove from oven and let cool for 15 minutes. Add the lettuce and serve.",
      ],
    },
    {
      name: "Fish Tacos",
      ingredients: [
        { name: "Whitefish", amount: 1, measurement: "l lb" },
        { name: "Cheese", amount: 1, measurement: "cup" },
        { name: "Iceberg Lettuce", amount: 2, measurement: "cups" },
        { name: "Tomatoes", amount: 2, measurement: "large" },
        { name: "Tortillas", amount: 3, measurement: "med" },
      ],
      steps: [
        "Cook the fish on the grill until hot.",
        "Place the fish on the 3 tortillas.",
        "Top them with lettuce, tomatoes, and cheese",
      ],
    },
  ];

  return (
    <>
      {data.map((d, i) => (
        <section id={i}>
          <h1>{d.name}</h1>
          {d.steps.map((s, i)=>(
            <li>{s}</li>
          ))}
        </section>
      ))}
    </>
  )

}

export default App;
上記を実行すると、以下のような画面になります。
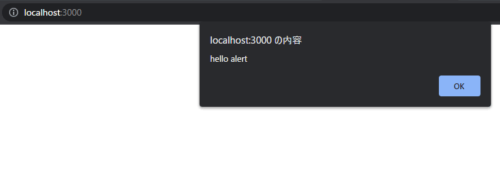
UI が描画される前にアラートが発生しています。
useEffect を使用して、UI を描画してから、アラートを発生させてみます。
プログラムの変更
App2.js のみ変更します。useEffect の公式の説明はこちらです。
import React, { useEffect } from "react";
import { useTestContext } from "./TestProvider";

function App() {
  const {alertProvider} = useTestContext();
  const {logProvider} = useTestContext();
  // alertProvider();
  // logProvider("this is log provider");

  useEffect(()=>{
    alertProvider();
    logProvider("this is log provider");
    // eslint-disable-next-line
  }, [])

  const data = [
    {
      name: "Baked Salmon",
      ingredients: [
        { name: "Salmon", amount: 1, measurement: "l lb" },
        { name: "Pine Nuts", amount: 1, measurement: "cup" },
        { name: "Butter Lettuce", amount: 2, measurement: "cups" },
        { name: "Yellow Squash", amount: 1, measurement: "med" },
        { name: "Olive Oil", amount: 0.5, measurement: "cup" },
        { name: "Garlic", amount: 3, measurement: "cloves" },
      ],
      steps: [
        "Preheat the oven to 350 degrees.",
        "Spread the olive oil around a glass baking dish.",
        "Add the salmon, garlic, and pine nuts to the dish.",
        "Bake for 15 minutes.",
        "Add the yellow squash and put back in the oven for 30 mins.",
        "Remove from oven and let cool for 15 minutes. Add the lettuce and serve.",
      ],
    },
    {
      name: "Fish Tacos",
      ingredients: [
        { name: "Whitefish", amount: 1, measurement: "l lb" },
        { name: "Cheese", amount: 1, measurement: "cup" },
        { name: "Iceberg Lettuce", amount: 2, measurement: "cups" },
        { name: "Tomatoes", amount: 2, measurement: "large" },
        { name: "Tortillas", amount: 3, measurement: "med" },
      ],
      steps: [
        "Cook the fish on the grill until hot.",
        "Place the fish on the 3 tortillas.",
        "Top them with lettuce, tomatoes, and cheese",
      ],
    },
  ];

  return (
    <>
      {data.map((d, i) => (
        <section id={i}>
          <h1>{d.name}</h1>
          {d.steps.map((s, i)=>(
            <li>{s}</li>
          ))}
        </section>
      ))}
    </>
  )

}

export default App;
useEffect を追記しました。
上記を実行すると、以下のようになります。
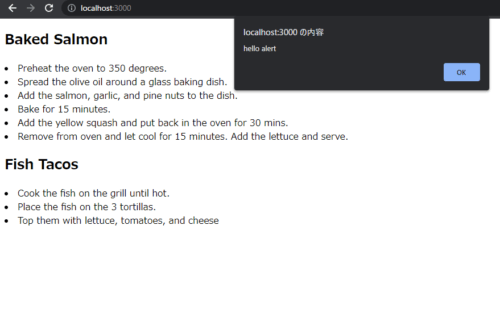
UI が描画されている状態で、アラートを発生させることができました。
変更した部分の説明をします。
useEffect(()=>{
  alertProvider();
  logProvider("this is log provider");
  // eslint-disable-next-line
}, [])
useEffect 関数内に処理を記述することで、return の実行後にその処理を実行することができます。
// eslint-disable-next-line は、ワーニングを消すためのおまじないです。
これがないと、
React Hook useEffect has missing dependencies: ‘alertProvider’ and ‘logProvider’. Either include them or remove the dependency array react-hooks/exhaustive-deps
といったエラーが出ます。
最後の [] は、依存する変数がないので、今回は空のままにしておきます。
おわりに
今回は useEffect を使用して UI の描画後に処理を実行する方法について説明しました。
これを使用すれば、処理待ち時間に何も表示されない状況を回避することができます。
次回は、フックを簡単にまとめようと思います。

コメント