はじめに
今回からは React について少し記事を書いていきます。
React を勉強するきっかけは、Python でバックエンドを作成できるので、後はフロントエンドができればいいのでは?と考えたからです。
少し React を使用しましたが、非常にシンプルで分かりやすいフレームワークだと思います。
前提条件
前提条件は以下の通りです。
- Windows11
- VS Code がインストールされている
Node.js のインストール
まず始めに、Node.js をインストールします。
こちらの公式サイトからアクセスしてください。
LTS版をインストールしてください。
インストール後、powershell を開いて、以下のコマンドを実行してください。
>> node -v
v18.16.0
>> npm -v
9.5.1
バージョンが表示されていれば成功です。
開発環境の作成
開発環境を作成していきます。PowerShell 上で実行していきます。
mkdir react-test-app
cd react-test-app
React では、npx create-react-app <app名> で環境を作成することができます。
npx create-react-app first-app

-------
We suggest that you begin by typing:

  cd first-app
  npm start

Happy hacking!
成功すると、最終行に Happy hacking! と表示されます。
書いてある通りに、動かしてみます。
cd first-app
npm start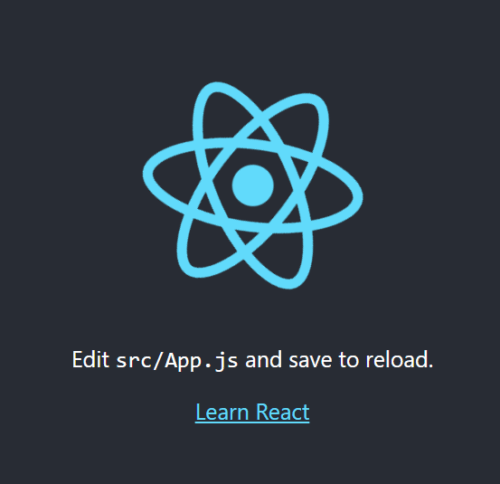
上記のように表示されれば成功です。
Ctrl + C で npm を停止します。
追加パッケージをインストールしていきます。
npm install react-router-dom
npm install --save-dev @babel/plugin-proposal-private-property-in-object
VS Code の設定
続いて、VS Code の設定をします。
code .以下の拡張機能をインストールしてください。
- ES7 React/Redux/GraphQL/React-Native snippets
- VSCode React Refactor
ファイルの削除
初期ファイルには不要なものもあるので、削除していきます。
create-react-app 後は以下のような構成になっています。
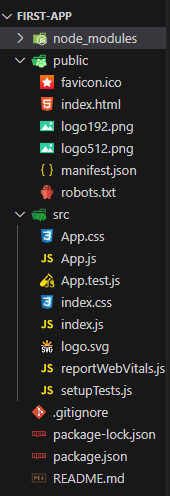
最低限必要なものを残すと、以下のようになります。
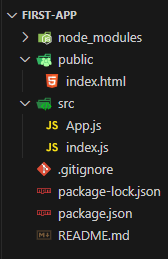
この状態で npm start を実行すると、以下のようなエラーが出ます。
ERROR in ./src/App.js 4:0-30
Module not found: Error: Can't resolve './logo.svg' in 'C:\Users\ryoya\react-pit\react-test-app\first-app\src'

ERROR in ./src/App.js 5:0-19
Module not found: Error: Can't resolve './App.css' in 'C:\Users\ryoya\react-pit\react-test-app\first-app\src'

ERROR in ./src/index.js 6:0-21
Module not found: Error: Can't resolve './index.css' in 'C:\Users\ryoya\react-pit\react-test-app\first-app\src'

ERROR in ./src/index.js 8:0-48
Module not found: Error: Can't resolve './reportWebVitals' in 'C:\Users\ryoya\react-pit\react-test-app\first-app\src'

webpack compiled with 4 errors
エラーが4つ発生しています。
App.js と index.js を変更します。
App.js
function App() {
  return (
    <div>Hello</div>
  );
}

export default App;
index.js
import React from 'react';
import ReactDOM from 'react-dom/client';
import App from './App';

const root = ReactDOM.createRoot(document.getElementById('root'));
root.render(
  <React.StrictMode>
    <App />
  </React.StrictMode>
);
変更が完了したら、保存して npm start を実行してください。
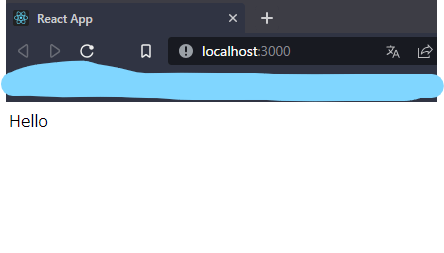
この状態で、右クリック > 検証 をクリックすると、右側にバーが現れます。
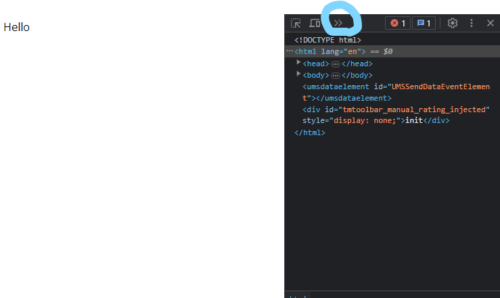
青丸の >> をクリックして Console を選択してください。
すると、エラーが出力されているのが分かります。
Manifest: Line: 1, column: 1, Syntax error.上記は index.html のエラーとなります。
index.html の変更
<!DOCTYPE html>
<html lang="en">
  <head>
    <meta charset="utf-8" />
    <meta name="viewport" content="width=device-width, initial-scale=1" />
    <meta name="theme-color" content="#000000" />
    <meta
      name="description"
      content="Web site created using create-react-app"
    />
    <title>First App</title>
  </head>
  <body>
    <noscript>You need to enable JavaScript to run this app.</noscript>
    <div id="root"></div>
    <!--
      This HTML file is a template.
      If you open it directly in the browser, you will see an empty page.

      You can add webfonts, meta tags, or analytics to this file.
      The build step will place the bundled scripts into the <body> tag.

      To begin the development, run `npm start` or `yarn start`.
      To create a production bundle, use `npm run build` or `yarn build`.
    -->
  </body>
</html>
これで完成です!
おわりに
今回は React の導入方法について説明しました。
これができれば、あとは参考書をテストするのも、カメラを使用するのもできるようになります。
React は、デフォルトでは SEO 対策等には向いていないので、検索結果の上位に掲載したい場合は Next.js 等を使用してください。
シンプルな Webアプリなら、React で早く簡単に実装できます。


コメント