
はじめに
前回はマウスイベントの基本的な部分について説明しました。
今回は、マウスイベントを用意すると、他の Widget が操作できなくなる問題の回避方法について説明します。
以下サイトを参考にさせていただきました。
Kivy 特定のウェジットだけでon_touch_downを使う(Python クリックした座標を取り出す)
前提条件
前提条件は以下の通りです。
- Python がインストールされている
- Windows11 (Ubuntuでも可?)
- Kivy[full] がインストールされている
問題点の再現プログラム
kv ファイル
<MainWidget>:
    orientation: 'vertical'
    padding: [20, 20]
    Image:
        id: camera_preview
    Button:
        text: 'start capture'
        on_release: root.start_capture()
        size_hint: 1.0, 0.1
        font_size: 25
py ファイル
from kivy.app import App
from kivy.lang.builder import Builder
Builder.load_file('test_6.kv')

from kivy.core.window import Window
Window.size = (960, 540)

from kivy.uix.boxlayout import BoxLayout

from kivy.graphics.texture import Texture
from kivy.clock import Clock

import cv2

class MainWidget(BoxLayout):
    def __init__(self, **kwargs):
        super(BoxLayout, self).__init__(**kwargs)
        self.w, self.h = 640, 480
        size = self.h * self.w * 3
        buf = [int(x * 255 / size) for x in range(size)]
        buf = bytes(buf)
        texture = Texture.create(size=(self.w, self.h), colorfmt="bgr")
        texture.blit_buffer(buf, colorfmt="bgr", bufferfmt="ubyte")
        self.capture_image = self.ids.camera_preview
        self.capture_image.texture = texture

    def start_capture(self):
        self.capture_image = self.ids.camera_preview
        self.cap = cv2.VideoCapture(1, cv2.CAP_DSHOW)
        self.clock_event1 = Clock.schedule_interval(self.update, 1.0/30.0)

    # Normal Capture Event
    def update(self, _):
        _, self.frame = self.cap.read()
        buf = cv2.flip(self.frame, 0).tobytes()
        texture = Texture.create(size=(self.frame.shape[1], self.frame.shape[0]), colorfmt="bgr")
        texture.blit_buffer(buf, colorfmt="bgr", bufferfmt="ubyte")
        self.capture_image.texture = texture

    def on_touch_down(self, touch):
        print("down: ", touch)

    def on_touch_up(self, touch):
        print("up: ", touch)

    def on_touch_move(self, touch):
        print("move", touch)

class MyApp(App):
    def build(self):
        return MainWidget()

if __name__ == '__main__':
    MyApp().run()
上記を実行すると、以下の画面が起動します。
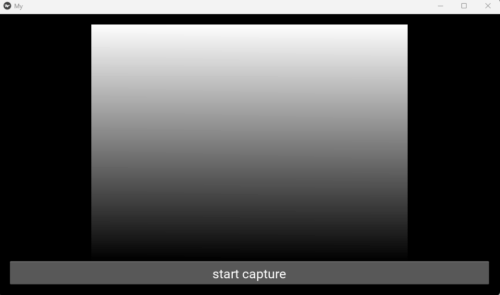
この状態で Start Capture ボタンをクリックすると、何の反応もありません。コンソールにはマウス座標が出力されるのみです。
回避方法
回避方法としては、特定の Widget のみとマウスイベントを紐づけることです。
kv ファイル
<MainWidget>:
    orientation: 'vertical'
    padding: [20, 20]
    Image:
        id: camera_preview
        on_touch_down: root.on_image_down(args[1])
        on_touch_move: root.on_image_move(args[1])
        on_touch_up: root.on_image_up(args[1])
    Button:
        text: 'start capture'
        on_release: root.start_capture()
        size_hint: 1.0, 0.1
        font_size: 25
Image Widget に各種マウスイベントを紐づけました。
py ファイル
from kivy.app import App
from kivy.lang.builder import Builder
Builder.load_file('test_6.kv')

from kivy.core.window import Window
Window.size = (960, 540)

from kivy.uix.boxlayout import BoxLayout

from kivy.graphics.texture import Texture
from kivy.clock import Clock

import cv2

class MainWidget(BoxLayout):
    def __init__(self, **kwargs):
        super(BoxLayout, self).__init__(**kwargs)
        self.w, self.h = 640, 480
        size = self.h * self.w * 3
        buf = [int(x * 255 / size) for x in range(size)]
        buf = bytes(buf)
        texture = Texture.create(size=(self.w, self.h), colorfmt="bgr")
        texture.blit_buffer(buf, colorfmt="bgr", bufferfmt="ubyte")
        self.capture_image = self.ids.camera_preview
        self.capture_image.texture = texture

    def start_capture(self):
        self.capture_image = self.ids.camera_preview
        self.cap = cv2.VideoCapture(1, cv2.CAP_DSHOW)
        self.clock_event1 = Clock.schedule_interval(self.update, 1.0/30.0)

    # Normal Capture Event
    def update(self, _):
        _, self.frame = self.cap.read()
        buf = cv2.flip(self.frame, 0).tobytes()
        texture = Texture.create(size=(self.frame.shape[1], self.frame.shape[0]), colorfmt="bgr")
        texture.blit_buffer(buf, colorfmt="bgr", bufferfmt="ubyte")
        self.capture_image.texture = texture

    def on_image_down(self, touch):
        self.touch_pos_x, self.touch_pos_y = touch.pos[0], touch.pos[1]
        print(self.touch_pos_x, self.touch_pos_y)

    def on_image_move(self, touch):
        self.touch_pos_x, self.touch_pos_y = touch.pos[0], touch.pos[1]
        print(self.touch_pos_x, self.touch_pos_y)

    def on_image_up(self, touch):
        self.touch_pos_x, self.touch_pos_y = touch.pos[0], touch.pos[1]
        print(self.touch_pos_x, self.touch_pos_y)

class MyApp(App):
    def build(self):
        return MainWidget()

if __name__ == '__main__':
    MyApp().run()
上記を実行し、StartCapture ボタンを押すと、映像が表示されます。
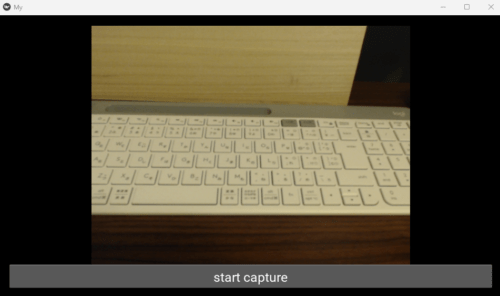
画像の上でマウスクリックやドラッグを実行してみてください。マウス座標が出力されるはずです。
おわりに
今回は Kivy のマウスイベントに関する問題点とその回避方法について説明しました。
今まで説明したことを組み合わせると、様々なアプリを作成することができます。
実際に作成して販売していますので、よければこちらもご覧ください。

コメント