はじめに
前回は、カメラ映像を表示する方法について説明しました。
今回は、マウスイベントの取り扱い方について説明します。
前提条件
前提条件は以下の通りです。
- Python がインストールされている
- Windows11 (Ubuntuでも可?)
- Kivy[full] がインストールされている
マウスイベントについて
Kivy では、他の GUI ライブラリと同じようにマウスのクリック、ドラッグ等を検知することができます。
公式サイトの説明はこちらにあります。
マウスイベントの主な関数は以下の3つです。
- on_touch_down … マウスボタンを押し込んだことを検知
- on_touch_up … マウスボタンを押し込み→離したことを検知
- on_touch_move … マウスボタンを押し込みながらカーソルを動かしたことを検知
実際に動かしてみる
実際にプログラムを書いて動かしてみます。
.kv ファイル
<MainWidget>:
    orientation: 'vertical'
    padding: [20, 20]
    Image:
        id: camera_preview
    Button:
        text: 'start capture'
        on_release: root.start_capture()
        size_hint: 1.0, 0.1
        font_size: 25
.py ファイル
from kivy.app import App
from kivy.lang.builder import Builder
Builder.load_file('test_6.kv')
from kivy.core.window import Window
Window.size = (960, 540)
from kivy.uix.boxlayout import BoxLayout
from kivy.graphics.texture import Texture
from kivy.clock import Clock
import cv2
class MainWidget(BoxLayout):
def __init__(self, **kwargs):
super(BoxLayout, self).__init__(**kwargs)
self.w, self.h = 640, 480
size = self.h * self.w * 3
buf = [int(x * 255 / size) for x in range(size)]
buf = bytes(buf)
texture = Texture.create(size=(self.w, self.h), colorfmt="bgr")
texture.blit_buffer(buf, colorfmt="bgr", bufferfmt="ubyte")
self.capture_image = self.ids.camera_preview
self.capture_image.texture = texture
def start_capture(self):
self.capture_image = self.ids.camera_preview
self.cap = cv2.VideoCapture(1, cv2.CAP_DSHOW)
self.clock_event1 = Clock.schedule_interval(self.update, 1.0/30.0)
# Normal Capture Event
def update(self, _):
_, self.frame = self.cap.read()
buf = cv2.flip(self.frame, 0).tobytes()
texture = Texture.create(size=(self.frame.shape[1], self.frame.shape[0]), colorfmt="bgr")
texture.blit_buffer(buf, colorfmt="bgr", bufferfmt="ubyte")
self.capture_image.texture = texture
def on_touch_down(self, touch):
print("down: ", touch)
def on_touch_up(self, touch):
print("up: ", touch)
def on_touch_move(self, touch):
print("move", touch)
class MyApp(App):
def build(self):
return MainWidget()
if __name__ == '__main__':
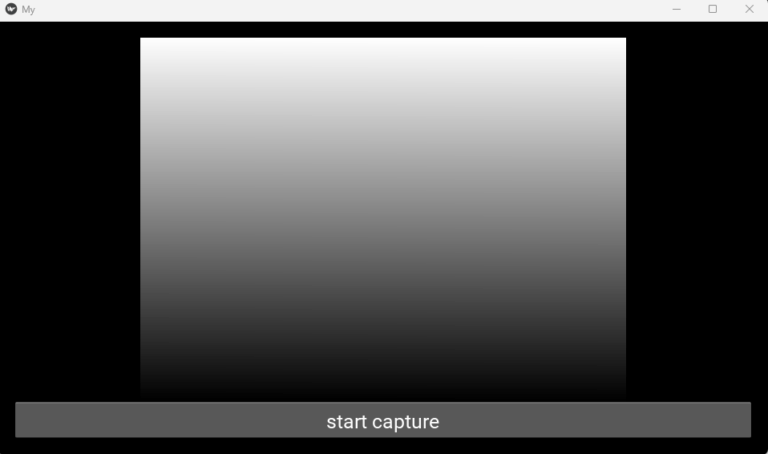
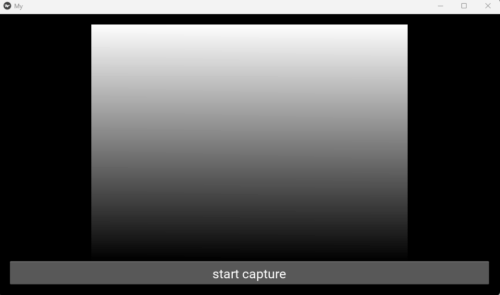
MyApp().run()上記を実行すると、以下の画面が表示されます。
また、適当なところをドラッグすると、以下の出力が得られます。
down:  <MouseMotionEvent spos=(0.07924921793534932, 0.7884972170686456) pos=(76.0, 425.0)>
move <MouseMotionEvent spos=(0.07924921793534932, 0.7847866419294991) pos=(76.0, 423.0)>
move <MouseMotionEvent spos=(0.08446298227320125, 0.764378478664193) pos=(81.0, 412.0)>
move <MouseMotionEvent spos=(0.08759124087591241, 0.7532467532467533) pos=(84.0, 406.0)>
move <MouseMotionEvent spos=(0.09071949947862357, 0.7476808905380334) pos=(87.0, 403.0)>
move <MouseMotionEvent spos=(0.09176225234619395, 0.7402597402597403) pos=(88.0, 399.0)>
move <MouseMotionEvent spos=(0.09280500521376434, 0.738404452690167) pos=(89.0, 398.0)>
move <MouseMotionEvent spos=(0.0948905109489051, 0.7365491651205938) pos=(91.0, 397.00000000000006)>
move <MouseMotionEvent spos=(0.09593326381647549, 0.7346938775510203) pos=(92.0, 395.99999999999994)>
move <MouseMotionEvent spos=(0.09697601668404589, 0.7309833024118738) pos=(93.0, 394.0)>
move <MouseMotionEvent spos=(0.10114702815432743, 0.7217068645640075) pos=(97.0, 389.0)>
move <MouseMotionEvent spos=(0.10218978102189781, 0.7198515769944341) pos=(98.0, 388.0)>
move <MouseMotionEvent spos=(0.10636079249217935, 0.7105751391465678) pos=(102.0, 383.00000000000006)>
move <MouseMotionEvent spos=(0.10740354535974973, 0.7087198515769944) pos=(103.0, 381.99999999999994)>
move <MouseMotionEvent spos=(0.10948905109489052, 0.7012987012987013) pos=(105.0, 378.0)>
move <MouseMotionEvent spos=(0.1105318039624609, 0.7012987012987013) pos=(106.0, 378.0)>
move <MouseMotionEvent spos=(0.1105318039624609, 0.699443413729128) pos=(106.0, 377.0)>
up:  <MouseMotionEvent spos=(0.1105318039624609, 0.699443413729128) pos=(106.0, 377.0)>
出力について説明します。
<MouseMotionEvent spos=(0.07924921793534932, 0.7884972170686456) pos=(76.0, 425.0)>spos: 相対座標
pos: 絶対座標
となります。
各データを取得するには、
touch.spos
touch.pos
で取得することができます。
おわりに
今回は Kivy でマウスイベントを取得する方法について説明しました。
しかしながら、今回説明した方法だと、どこをクリックしてもマウスイベントが発動してしまいます。
Start Capture ボタンをクリックすることができません。
次回は、上記問題点の回避方法について説明します。

コメント