はじめに
前回は点群データの合成方法について説明しました。
今回は、yolov5 と open3d を組み合わせて、特定の物体の点群を切り出す方法について説明します。
前提条件
前提条件は、以下の通りです。
- pyrealsense2
- OpenCV ==4.6.0
- Python == 3.9.13
- Windows11
- open3D == 0.16.0
- pytorch == 1.12.1
pointcloud と RGB画像 の作成
まず始めに、pointcloud と、RGB画像 を出力するプログラムを作成します。
cd ~/realsense-dev
mkdir yolo2realsense
cd yolo2realsense
yolo2realsense フォルダに、make_pointcloud.py を作成します。
コードは以下のようにしてください。
import pyrealsense2 as rs
import numpy as np
import cv2
import open3d as o3d
import datetime

# Configure depth and color streams
pipeline = rs.pipeline()
config = rs.config()
config.enable_stream(rs.stream.depth, 640, 480, rs.format.z16, 30)
config.enable_stream(rs.stream.color, 640, 480, rs.format.bgr8, 30)

# Start streaming
pipeline.start(config)
align = rs.align(rs.stream.color)

vis = o3d.cuda.pybind.visualization.Visualizer()
vis.create_window('PCD', width=640, height=480)
pointcloud = o3d.cuda.pybind.geometry.PointCloud()
geom_added = False

while True:
    dt0 = datetime.datetime.now()
    frames = pipeline.wait_for_frames()
    frames = align.process(frames)
    profile = frames.get_profile()
    depth_frame = frames.get_depth_frame()
    color_frame = frames.get_color_frame()
    if not depth_frame or not color_frame:
        continue

    # Convert images to numpy arrays
    depth_image = np.asanyarray(depth_frame.get_data())
    color_image = np.asanyarray(color_frame.get_data())
    o3d_color_image = cv2.cvtColor(color_image, cv2.COLOR_BGR2RGB)

    img_depth = o3d.geometry.Image(depth_image)
    img_color = o3d.geometry.Image(o3d_color_image)
    rgbd = o3d.geometry.RGBDImage.create_from_color_and_depth(img_color, img_depth, convert_rgb_to_intensity=False)

    intrinsics = profile.as_video_stream_profile().get_intrinsics()

    pinhole_camera_intrinsic = o3d.camera.PinholeCameraIntrinsic(intrinsics.width, intrinsics.height, intrinsics.fx, intrinsics.fy, intrinsics.ppx, intrinsics.ppy)
    pcd = o3d.cuda.pybind.geometry.PointCloud.create_from_rgbd_image(rgbd, pinhole_camera_intrinsic)

    pcd.transform([[1, 0, 0, 0], [0, -1, 0, 0], [0, 0, -1, 0], [0, 0, 0, 1]])

    pointcloud.points = pcd.points
    pointcloud.colors = pcd.colors

    if geom_added == False:
        vis.add_geometry(pointcloud)
        geom_added = True
    vis.update_geometry(pointcloud)
    vis.poll_events()
    vis.update_renderer()

    cv2.imshow('bgr', color_image)
    key = cv2.waitKey(1)
    if key == ord('q'):
        break

    process_time = datetime.datetime.now() - dt0
    print("FPS: " + str(1 / process_time.total_seconds()))


voxel_down_pcd = pcd.voxel_down_sample(voxel_size=0.005)
alpha = 0.005
mesh = o3d.cuda.pybind.geometry.TriangleMesh.create_from_point_cloud_alpha_shape(voxel_down_pcd, alpha)
mesh.compute_vertex_normals()
o3d.io.write_triangle_mesh("output.ply", mesh)

cv2.imwrite("output.png", color_image)

pipeline.stop()
cv2.destroyAllWindows()
vis.destroy_window()
del vis詳細はこちらの記事で説明したので省略します。
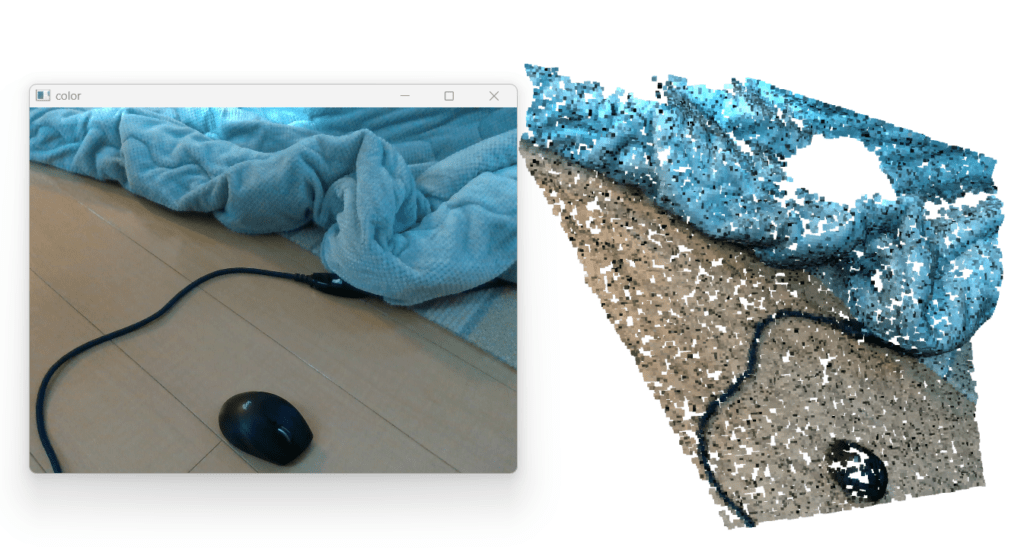
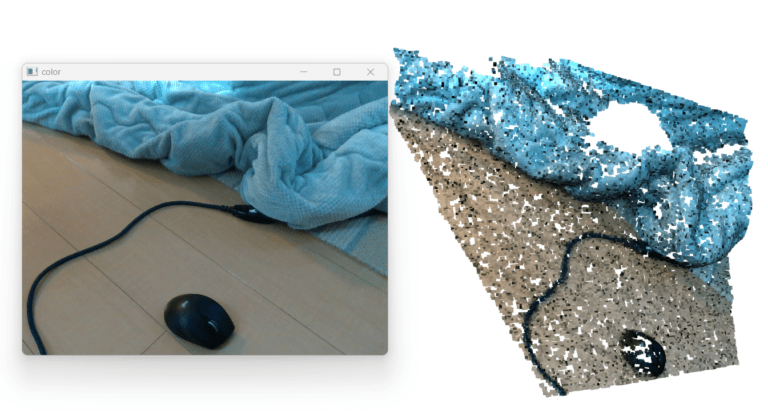
上記プログラムを実行すると、以下のような画像と点群が得られます。

今回は yolov5 の学習方法についてはこちらの記事で説明しています。
今回は、元から学習してあるマウスを検出します。
yolov5 の準備
yolov5 を準備していきます。
cd ~/realsense-dev/yolo2realsense
git clone https://github.com/ultralytics/yolov5.git
mv yolov5 yolov5_object
~/realsense-dev/yolo2realsense に、crop_pointcloud.py というファイルを作成してください。
コードは以下のようになります。
import pyrealsense2 as rs
import numpy as np
import cv2
import open3d as o3d
import datetime
import torch

from yolov5_object.models.common import DetectMultiBackend
from yolov5_object.utils.augmentations import letterbox
from yolov5_object.utils.general import non_max_suppression

# ======================= yolov5 ========================= #
frame = cv2.imread("./output.png")
h, w, _ = frame.shape
device = "cuda"
model = DetectMultiBackend("./yolov5/yolov5s.pt", device=device, dnn=False, data='./yolov5/data/coco128.yaml', fp16=True)
stride, names, pt = model.stride, model.names, model.pt
conf_thres = 0.45
iou_thres = 0.25
classes = None

# Padded resize
img = letterbox(frame, 640, stride=stride, auto=True)[0]

# Convert
img = img.transpose((2, 0, 1))[::-1]  # HWC to CHW, BGR to RGB
img = np.ascontiguousarray(img)

im = torch.from_numpy(img).to(device)
im = im.half() if model.fp16 else im.float()  # uint8 to fp16/32
im /= 255  # 0 - 255 to 0.0 - 1.0
if len(im.shape) == 3:
    im = im[None]  # expand for batch dim

pred = model(im, augment=False, visualize=False)
pred = non_max_suppression(pred, conf_thres, iou_thres, classes, False, max_det=50)
pred_cpu = pred[0][0].cpu().detach().numpy()
index = int(pred_cpu[5])
# print(pred_cpu, index, names[index])
x1, y1, x2, y2 = int(pred_cpu[0]), int(pred_cpu[1]), int(pred_cpu[2]), int(pred_cpu[3])
yolo_clip_image = frame[y1:y2, x1:x2]

# ======================= yolov5 to open3d ========================= #
# image shape is h, w, ch
# yolov5 coordinate origin is left-top
# realsense coordinate origin is camera center = w/2, h/2
open3d_center_w, open3d_center_h, margin = w/2, h/2, 5
# shift center coordinate
yolo_obj_x1, yolo_obj_y1 = (x1-open3d_center_w-margin)/1000, (y1-open3d_center_h-margin)/1000
yolo_obj_x2, yolo_obj_y2 = (x2-open3d_center_w+margin)/1000, (y2-open3d_center_h+margin)/1000

bb = o3d.geometry.AxisAlignedBoundingBox(
    np.array([[yolo_obj_x1],[yolo_obj_y1],[-1.0]]),
    np.array([[yolo_obj_x2],[yolo_obj_y2],[1.0]]),
)

# ======================= open3d ========================= #

pcd = o3d.io.read_point_cloud("./output.ply")
pcd.transform([[1, 0, 0, 0], [0, -1, 0, 0], [0, 0, -1, 0], [0, 0, 0, 1]])

crop_pcd = pcd.crop(bb)

# Flip the pointclouds, otherwise they will be upside down.
o3d.visualization.draw([crop_pcd])
こちらを実行すると、以下のような出力が得られます。
yolov5_object フォルダ内の依存関係を解消しないと動かないので注意してください。
これに関しては次回説明します。

マウスの点群データを取得することができました。完成です。
おわりに
今回は yolov5 と open3d を組み合わせて点群の切り出しを行いました。
比較的良い精度で点群を切り出せていると思います。
ここから、ICP や Recognition 用のデータを作成することもできます。
コードの詳細に関しては、次回説明します。


コメント