はじめに
前回までの記事では、OpenCV の並列処理の説明をしました。

今回から、Realsense D435i を使用して、スキャンマッチング等に取り組んでいきます。
前提条件
前提条件は以下の通りです。
- Realsense がある
- OpenCV ==4.6.0
- Python == 3.9.13
今回はこちらの公式ページを参考に進めていきます。
pyrealsense2 のインストール
インストールコマンドは、以下の通りです。
pip install pyrealsense2これだけです。Intel すごい。
realsense の起動
こちらの公式ページを参考にプログラムを用意します。
## License: Apache 2.0. See LICENSE file in root directory.
## Copyright(c) 2015-2017 Intel Corporation. All Rights Reserved.
###############################################
## Open CV and Numpy integration ##
###############################################
import pyrealsense2 as rs
import numpy as np
import cv2
# Configure depth and color streams
pipeline = rs.pipeline()
config = rs.config()
# Get device product line for setting a supporting resolution
pipeline_wrapper = rs.pipeline_wrapper(pipeline)
pipeline_profile = config.resolve(pipeline_wrapper)
device = pipeline_profile.get_device()
device_product_line = str(device.get_info(rs.camera_info.product_line))
found_rgb = False
for s in device.sensors:
if s.get_info(rs.camera_info.name) == 'RGB Camera':
found_rgb = True
break
if not found_rgb:
print("The demo requires Depth camera with Color sensor")
exit(0)
config.enable_stream(rs.stream.depth, 640, 480, rs.format.z16, 30)
if device_product_line == 'L500':
config.enable_stream(rs.stream.color, 960, 540, rs.format.bgr8, 30)
else:
config.enable_stream(rs.stream.color, 640, 480, rs.format.bgr8, 30)
# Start streaming
pipeline.start(config)
try:
while True:
# Wait for a coherent pair of frames: depth and color
frames = pipeline.wait_for_frames()
depth_frame = frames.get_depth_frame()
color_frame = frames.get_color_frame()
if not depth_frame or not color_frame:
continue
# Convert images to numpy arrays
depth_image = np.asanyarray(depth_frame.get_data())
color_image = np.asanyarray(color_frame.get_data())
# Apply colormap on depth image (image must be converted to 8-bit per pixel first)
depth_colormap = cv2.applyColorMap(cv2.convertScaleAbs(depth_image, alpha=0.03), cv2.COLORMAP_JET)
depth_colormap_dim = depth_colormap.shape
color_colormap_dim = color_image.shape
# If depth and color resolutions are different, resize color image to match depth image for display
if depth_colormap_dim != color_colormap_dim:
resized_color_image = cv2.resize(color_image, dsize=(depth_colormap_dim[1], depth_colormap_dim[0]), interpolation=cv2.INTER_AREA)
images = np.hstack((resized_color_image, depth_colormap))
else:
images = np.hstack((color_image, depth_colormap))
# Show images
cv2.namedWindow('RealSense', cv2.WINDOW_AUTOSIZE)
cv2.imshow('RealSense', images)
lastkey = cv2.waitKey(1)
if lastkey==ord("q"):
break
finally:
# Stop streaming
print("stop streaming.")
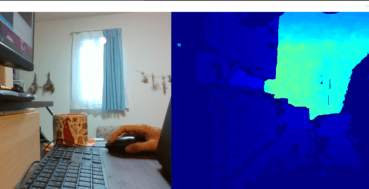
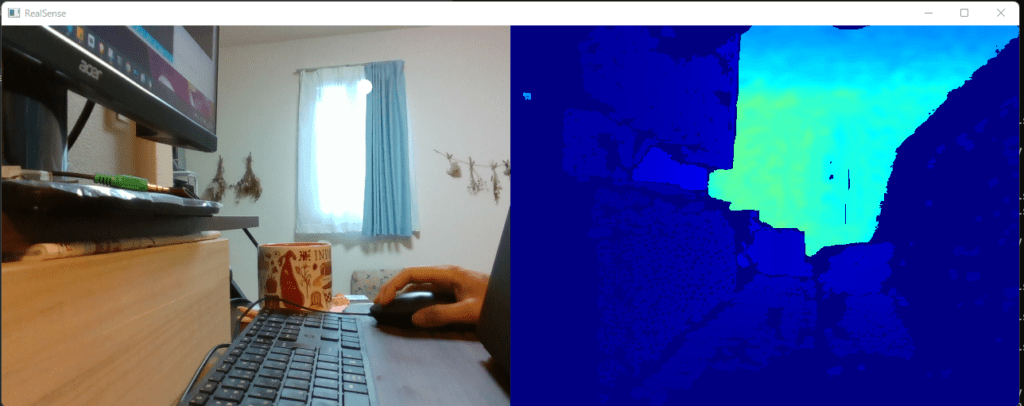
pipeline.stop()起動すると、BGR画像とDepth画像が得られます。
コードの説明
コードについて説明していきます。公式のドキュメントはこちらです。
# Configure depth and color streams
pipeline = rs.pipeline()
config = rs.config()
rs.pipeline() は realsense のライフサイクルを扱う関数です。ストリーミングの開始等も pipeline から指令を出します。
rs.config() は、pipeline をスタートする前に、設定引き渡すための関数です。
# Get device product line for setting a supporting resolution
pipeline_wrapper = rs.pipeline_wrapper(pipeline)
pipeline_profile = config.resolve(pipeline_wrapper)
device = pipeline_profile.get_device()
device_product_line = str(device.get_info(rs.camera_info.product_line))

found_rgb = False
for s in device.sensors:
    if s.get_info(rs.camera_info.name) == 'RGB Camera':
        found_rgb = True
        break
if not found_rgb:
    print("The demo requires Depth camera with Color sensor")
    exit(0)
device.get_info() でデバイスの機種名を抜き出します。
device.sensors で realsense に搭載されているセンサ情報を確認することができます。
D435i では
[<pyrealsense2.sensor: "Stereo Module">, <pyrealsense2.sensor: "RGB Camera">, <pyrealsense2.sensor: "Motion Module">]これらのセンサーが搭載されています。
config.enable_stream(rs.stream.depth, 640, 480, rs.format.z16, 30)

if device_product_line == 'L500':
    config.enable_stream(rs.stream.color, 960, 540, rs.format.bgr8, 30)
else:
    config.enable_stream(rs.stream.color, 640, 480, rs.format.bgr8, 30)
config.enable_stream() で realsense のストリームの解像度を決定します。
D435i の場合は、(640,480), (1280,720) があります。深度は (640, 480) のみです。
# Start streaming
pipeline.start(config)
pipeline.start() 実行時に、今まで設定した config のインスタンスを渡して、設定を適用します。
# Wait for a coherent pair of frames: depth and color
frames = pipeline.wait_for_frames()
depth_frame = frames.get_depth_frame()
color_frame = frames.get_color_frame()
if not depth_frame or not color_frame:
    continue
wait_for_frames() で、config で設定した FPS の次の周期を待ちます。
frames には、深度画像とBGR画像が格納されているので、それぞれ取り出す必要があります。
周期毎に画像を取得しますが、欠落している場合もあるので例外処理もしておきます。
# Convert images to numpy arrays
depth_image = np.asanyarray(depth_frame.get_data())
color_image = np.asanyarray(color_frame.get_data())
取り出した depth_frame はこちらの公式ページを参考に、様々な情報を取得することができます。
color_frame はこちらのページをご参考ください。
# Apply colormap on depth image (image must be converted to 8-bit per pixel first)
depth_colormap = cv2.applyColorMap(cv2.convertScaleAbs(depth_image, alpha=0.03), cv2.COLORMAP_JET)
color_image と次元を合わせるために convertScaleAbs() で変換します。
そして、applyColorMap() で深度データをBGRデータに変換します。
カラースケールに関しては、こちらにいろいろなスケールがあるので、お試しください。
(使えそうなのは RAINBOW か HSV くらい?
# If depth and color resolutions are different, resize color image to match depth image for display
if depth_colormap_dim != color_colormap_dim:
    resized_color_image = cv2.resize(color_image, dsize=(depth_colormap_dim[1], depth_colormap_dim[0]), interpolation=cv2.INTER_AREA)
    images = np.hstack((resized_color_image, depth_colormap))
else:
    images = np.hstack((color_image, depth_colormap))
BGR画像と深度BGR画像を横に連結します。
# Stop streaming
print("stop streaming.")
pipeline.stop()
pipeline.stop() で realsense のストリーミングを安全に停止します。
おわりに
今回は realsense のベースプログラムを作成し、説明しました。
次回は、ドキュメントに掲載されている中で必要なプログラムについて説明していきます。


コメント