はじめに
前回の記事では ROS2 の基本となる topic の確認方法とその内容について説明しました。
今回は、実際に Gazebo シミュレーション上で、IMU, LIDAR, カメラ、ディファレンシャルドライブの topic を Python で処理していきます。
前提条件
前提条件は、以下の通りです。
- IMU等センサの topic の内容を把握している
- /first_robot/cmd_vel の topic が存在している
ロボットを動かす
早速、Gazebo 上のロボットを動かしていきます。
まずは今まで通り、シミュレータを起動します。
ros2 launch ros2_first_test first_gazebo.launch.pyGazebo, Rviz2 が起動したら、以下を実行します。
ros2 run teleop_twist_keyboard teleop_twist_keyboard --ros-args --remap cmd_vel:=/first_robot/cmd_velこれは、teleop_twist_keyboard のパッケージを使用して、cmd_vel へ動作命令を出すプログラムとなります。詳細はROS公式サイトにあります。
また、–ros-args –remap cmd_vel:=/first_robot/cmd_vel は、本来このプログラムは/cmd_vel のトピックへ動作命令を送信するところを、/cmd_vel の代わりに /first_robot/cmd_vel へ送信するための引数となります。
上記を実行すると、ターミナルに以下のように表示されます。
This node takes keypresses from the keyboard and publishes them
as Twist messages. It works best with a US keyboard layout.
---------------------------
Moving around:
   u    i    o
   j    k    l
   m    ,    .

For Holonomic mode (strafing), hold down the shift key:
---------------------------
   U    I    O
   J    K    L
   M    <    >

t : up (+z)
b : down (-z)

anything else : stop

q/z : increase/decrease max speeds by 10%
w/x : increase/decrease only linear speed by 10%
e/c : increase/decrease only angular speed by 10%
これは、i を押すと直進し、< を押すと交代するプログラムです。
その他にもいろいろ試してみてください。q で動作速度を上昇させることができます。
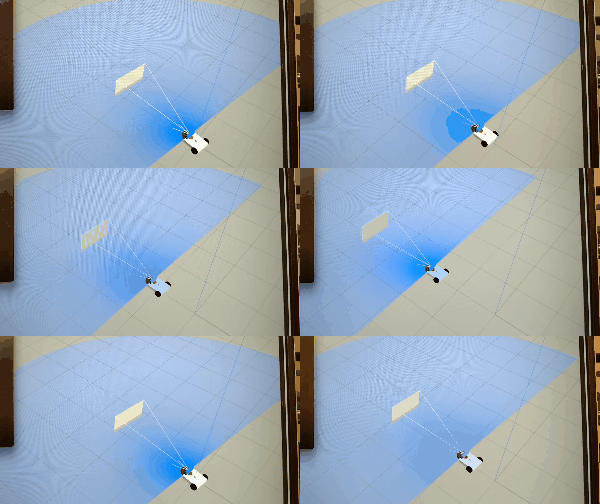
実際に動作させた様子がこちらです。

問題なく動作していれば完了です!
ロボットを動かすプログラムを作成する
早速、Python でロボットを動かすプログラムを作成していきます。
プログラムを実行すると、ロボットが真っ直ぐ進むだけのプログラムを作成します。
cd ~/ros_ws/src/ros2_first_test/ros2_first_test
touch translate_cmdvel.py
これで、translate_cmdvel.py を作成します。
このファイルに、以下のコードを記述してください。
import rclpy
from rclpy.node import Node
from geometry_msgs.msg import Twist

class first_robot_cmdvel(Node):
    def __init__(self):
        # wake up node name
        super().__init__("first_robot_cmdvel")
        # declare publisher
        self.publisher = self.create_publisher(Twist, "/first_robot/cmd_vel", 10)
        # period publisher
        timer_period = 1
        self.timer = self.create_timer(timer_period, self.send_cmd_vel)
        # creating a message object to fit new velocities and publish them
        self.velocity = Twist()

        self.linear_x = 0.3
        self.linear_y = 0.0
        self.linear_z = 0.0
        self.angle_x = 0.0
        self.angle_y = 0.0
        self.angle_z = 0.0

    def send_cmd_vel(self):
        # setting linear velocity
        self.velocity.linear.x = self.linear_x
        self.velocity.linear.y = self.linear_y
        self.velocity.linear.z = self.linear_z
        self.velocity.angular.x = self.angle_x
        self.velocity.angular.y = self.angle_y
        self.velocity.angular.z = self.angle_z
        self.publisher.publish(self.velocity)


def main(args=None):
    rclpy.init(args=args)
    frc = first_robot_cmdvel()
    rclpy.spin(frc)
    rclpy.shutdown()

if __name__ == "__main__":
    main()
main から説明していきます。
def main(args=None):
    rclpy.init(args=args)
    frc = first_robot_cmdvel()
    rclpy.spin(frc)
    rclpy.shutdown()
rclpy.init は ROS2 のシステムを立ち上げます。
rclpy.spin は first_robot_cmdvel のクラスを実行し続けます。
これとは別に、rclpy.spin_once というクラスを一度だけ実行する関数も用意されています。
rclpy.shutdown は ROS2 のシステムを終了します。
続いて、first_robot_cmdvel の中身を説明していきます。
class first_robot_cmdvel(Node):
    def __init__(self):
        # wake up node name
        super().__init__("first_robot_cmdvel")
        # declare publisher
        self.publisher = self.create_publisher(Twist, "/first_robot/cmd_vel", 10)
def __init__(self) は、first_robot_cmdvel が呼ばれた時に実行されます。
super().__init__(“first_robot_cmdvel”) は、rclpy.node の Node クラスを継承します。
ここでは、ノード名が “first_robot_cmdvel” となると考えてください。
self.publisher = self.create_publisher(Twist, “/first_robot/cmd_vel”, 10) は、Twist メッセージを /first_robot/cmd_vel に送信するクラスを作成します。
“10” は、通信の品質を設定する項目です。今は特に気にしなくても問題ありません。
# period publisher
timer_period = 1
self.timer = self.create_timer(timer_period, self.send_cmd_vel)
self.create_timer(timer_period, self.send_cmd_vel) は、timer_period 毎に self.send_cmd_vel を実行します。今回は1秒ごとに実行します。
# creating a message object to fit new velocities and publish them
self.velocity = Twist()
self.velocity を Twist クラスとします。Twist クラスの中身は、こちらに説明があります。
この場合、self.velocity.linear.x, y, z と self.velocity.angular.x, y, z に数値を入れる必要があります。
def send_cmd_vel(self):
    # setting linear velocity
    self.velocity.linear.x = self.linear_x
    self.velocity.linear.y = self.linear_y
    self.velocity.linear.z = self.linear_z
    self.velocity.angular.x = self.angle_x
    self.velocity.angular.y = self.angle_y
    self.velocity.angular.z = self.angle_z
    self.publisher.publish(self.velocity)
send_cmd_vel では、先ほど定義した self.velocity を
self.publisher.publish(self.velocity) にて topic を送信します。
これで、Python プログラムの作成は完了です。
setup.py の編集
Python プログラムは作成しましたが、このままではパッケージに登録されません。
setup.py を以下のように編集してください。
from setuptools import setup
import os
from glob import glob

package_name = 'ros2_first_test'

setup(
    name=package_name,
    version='0.0.0',
    packages=[package_name],
    data_files=[
        ('share/ament_index/resource_index/packages',
            ['resource/' + package_name]),
        ('share/' + package_name, ['package.xml']),

        (os.path.join('share', package_name, 'launch'), glob('launch/*.py')),
        (os.path.join('share', package_name, 'urdf'), glob('urdf/*')),
        (os.path.join('share', package_name, 'rviz'), glob('rviz/*')),

    ],
    install_requires=['setuptools'],
    zip_safe=True,
    maintainer='wsl-ubuntu',
    maintainer_email='wsl-ubuntu@todo.todo',
    description='TODO: Package description',
    license='TODO: License declaration',
    tests_require=['pytest'],
    entry_points={
        'console_scripts': [
            'translate_cmdvel=ros2_first_test.translate_cmdvel:main',
        ],
    },
)
今までの setup.py と異なる点を説明します。
'console_scripts': [
            'translate_cmdvel=ros2_first_test.translate_cmdvel:main',
        ],
この部分だけです。
作成した、ros2_first_test パッケージのtranslate_cmdvel.py の main 関数を
ros2 run ros2_first_test translate_cmdvel として実行できるようにします。
実際に動かしてみる
それでは、ターミナルに戻り、以下を実行してください。
cd ~/ros_ws
colcon build --packages-select ros2_first_test
source ~/bashrc
ros2 launch ros2_first_test first_gazebo.launch.py
続いて、別のターミナルを開き、以下を実行してください。
ros2 run ros2_first_test translate_cmdvelこれで、Gazebo 上のロボットが直進すれば成功です。
ただ、直進し続けるので、適当なところで終了してください。
IMUのデータを取得する
次に、IMUのデータを取得するプログラムを作成します。
cd ~/ros_ws/src/ros2_first_test/ros2_first_test
touch get_imu.py
今作成した get_imu.py に以下のコードを記述してください。
import rclpy
from rclpy.node import Node
from sensor_msgs.msg import Imu

class get_imu(Node):
    def __init__(self):
        # wake up node name
        super().__init__("get_imu_node")
        # declare subscriber
        self.subscription = self.create_subscription(Imu, "/first_robot/imu", self.get_scan_imu, 10)
        self.subscription

    def get_scan_imu(self, scan_data):
        print(scan_data)

def main(args=None):
    rclpy.init(args=args)
    gi = get_imu()
    rclpy.spin_once(gi)
    rclpy.shutdown()

if __name__ == "__main__":
    main()
先ほど異なる部分のみ説明します。
rclpy.spin_once(gi)これは、get_imu を一度のみ実行します。実行後、get_imu ノードは破棄されます。
self.subscription = self.create_subscription(Imu, "/first_robot/imu", self.get_scan_imu, 10)
self.subscription
self.create_subscription でサブスクライバーを作成します。
Imu のデータを取得するので、Imu のデータ型で取得します。
Imu のデータを受け取ったときに実行する関数が self.get_scan_imu となります。
あとは、create_publisher と同じです。
self.subscription でサブスクライバーを起動します。
def get_scan_imu(self, scan_data):
    print(scan_data)
get_scan_imu の引数 scan_data は、Imu 型のデータです。
また、ここでは単純にscan_data をコンソールに表示します。
実際に動かしてみる
ここまで来たら、あとは setup.py に今作成した get_scan.py を追加するだけです。
setup.py の該当部分を以下のコードに変更してください。
'console_scripts': [
    'translate_cmdvel=ros2_first_test.translate_cmdvel:main',
    'get_imu=ros2_first_test.get_imu:main',    ← この部分を追加
],
保存しましたら、ビルドを実行します。
cd ~/ros_ws
colcon build --packages-select ros2_first_test
source ~/.bashrc
ros2 launch ros2_first_test first_gazebo.launch.py
Rviz2 と Gazebo が起動したら、新しいターミナルを開いて以下を実行してください。
ros2 run ros2_first_test get_imuターミナルに以下の結果が出力されます。※改行してあります。
sensor_msgs.msg.Imu(
  header=std_msgs.msg.Header(
    stamp=builtin_interfaces.msg.Time(sec=69, nanosec=224000000), frame_id='imu_link'
    ),
    orientation=geometry_msgs.msg.Quaternion(
        x=-1.5846090798547442e-06, y=-2.974363253478611e-05, z=-0.05174133146043827, w=0.9986605197620995
    ),
    orientation_covariance=array([0., 0., 0., 0., 0., 0., 0., 0., 0.]),
    angular_velocity=geometry_msgs.msg.Vector3(x=0.0003635858206281065, y=0.011513474002279965, z=-0.0013422636330713287),
    angular_velocity_covariance=array([4.e-08, 0.e+00, 0.e+00, 0.e+00, 0.e+00, 0.e+00, 0.e+00, 0.e+00,0.e+00]),
    linear_acceleration=geometry_msgs.msg.Vector3(x=0.163164003847606, y=-0.0015069399184088521, z=9.597087101808075),
    linear_acceleration_covariance=array([0., 0., 0., 0., 0., 0., 0., 0., 0.])
)
このように、Imu のデータが確認できれば完了です。
おわりに
今回は cmd_vel の パブリッシャーと Imu のサブスクライバーを作成しました。
上記を使えば Imu がある値の時に、cmd_vel が直進する・・・といったプログラムを作成することが可能です。
次回は、説明しきれなかった LIDAR と カメラをPythonで扱います。
さらにその次回にはこれらを連動させようと思います。


コメント