はじめに
前回はポップアップの作成方法について説明しました。
今回は、ファイルダイアログの作成方法について説明します。
前提条件
前提条件は以下の通りです。
- Python がインストールされている
- Windows11 (Ubuntuでも可?)
- Kivy[full] がインストールされている
ファイルダイアログ
ファイルダイアログは、カスタムクラスを用意して、ポップアップで表示します。
公式サイトの説明はこちらにあります。
まずは、ポップアップの close を ObjectProperty を使用して定義する方法について説明します。
ObjectProperty を使用した関数のバインド
ObjectProperty を使用すると、別クラスの関数から参照が可能になります。
以下に実行例を示します。
kv ファイル
<MainWidget>:
    orientation: 'vertical'
    padding: [20, 20]
    Label:
        text: "File Dialog"
        size_hint: 1.0, 0.3
        font_size: 30
    Button:
        text: 'open popup'
        on_release: root.custom_popup()
        size_hint: 1.0, 0.15
        font_size: 25
    Label:
        id: label1
        text: ""
        size_hint: 1.0, 0.50

<CustomPopup>:
    orientation: "vertical"
    Label:
        text:'Warning'
    Button:
        text:"OK"
        on_release: root.ok_button()
py ファイル
from kivy.app import App
from kivy.lang.builder import Builder
Builder.load_file('test_5.kv')

from kivy.core.window import Window
Window.size = (960, 540)

from kivy.uix.boxlayout import BoxLayout
from kivy.uix.floatlayout import FloatLayout
from kivy.uix.popup import Popup

from kivy.properties import ObjectProperty

class CustomPopup(BoxLayout):
    ok_button = ObjectProperty(None)

class MainWidget(BoxLayout):
    def custom_popup(self):
        content = CustomPopup(ok_button=self.dismiss_popup)
        self._popup = Popup(title='warning popup', content=content, size_hint=(0.9, 0.9))
        self._popup.open()

    def dismiss_popup(self):
        self._popup.dismiss()


class MyApp(App):
    def build(self):
        return MainWidget()


if __name__ == '__main__':
    MyApp().run()
簡単にコードの説明をします。
新しく登場したのが、ObjectProperty です。公式サイトの説明はこちらです。
from kivy.properties import ObjectProperty

class CustomPopup(BoxLayout):
    ok_button = ObjectProperty(None)
ObjectProperty を使用して ok_button を宣言しておきます。
すると、他クラスからインスタンスを作成した際に継承することができます。
class MainWidget(BoxLayout):
    def custom_popup(self):
        content = CustomPopup(ok_button=self.dismiss_popup)
    def dismiss_popup(self):
        self._popup.dismiss()
上記のように、CustomPopup 作成時に ok_button へ dismiss_popup をバインドすることが可能になりました。
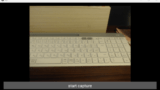
このプログラムを実行すると、以下のように動作します。
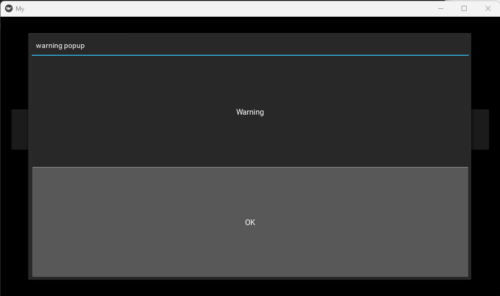
OK ボタンをクリックすると、ポップアップが閉じることを確認してください。
ファイルダイアログの作成
ファイルダイアログの作成は、FileChooser を使用します。
公式サイトの説明は、こちらにあります。
kv ファイル
<MainWidget>:
    orientation: 'vertical'
    padding: [20, 20]
    Label:
        text: "File Dialog"
        size_hint: 1.0, 0.3
        font_size: 30
    Button:
        text: 'open popup'
        on_release: root.load_dialog()
        size_hint: 1.0, 0.15
        font_size: 25
    Label:
        id: label1
        text: "empty path"
        size_hint: 1.0, 0.50

<CustomPopup>:
    size: root.size
    pos: root.pos
    orientation: "vertical"
    FileChooserIconView:
        id: filechooser
        path: './'
    BoxLayout:
        size_hint_y: None
        height: 30
        Button:
            text: "Cancel"
            on_release: root.cancel()
        Button:
            text: "Load"
            on_release: root.load(filechooser.selection)
py ファイル
from kivy.app import App
from kivy.lang.builder import Builder
Builder.load_file('test_5.kv')

from kivy.core.window import Window
Window.size = (960, 540)

from kivy.uix.boxlayout import BoxLayout
from kivy.uix.popup import Popup

from kivy.properties import ObjectProperty

class CustomPopup(BoxLayout):
    load = ObjectProperty(None)
    cancel = ObjectProperty(None)

class MainWidget(BoxLayout):
    def load_dialog(self):
        content = CustomPopup(load=self.load, cancel=self.dismiss_popup)
        self._popup = Popup(title='Load file', content=content, size_hint=(0.9, 0.9))
        self._popup.open()

    # delete popup
    def dismiss_popup(self):
        self._popup.dismiss()

    # load
    def load(self, load_path):
        self.dismiss_popup()
        self.ids.label1.text = load_path[0]

class MyApp(App):
    def build(self):
        return MainWidget()


if __name__ == '__main__':
    MyApp().run()
新しい単語が登場したので説明します。
kvファイル
FileChooserIconView:
    id: filechooser
    path: './'
FileChooserIconView は、ファイルをアイコンで表示します。
他にも、文字のみで表示する FileChooserListView があります。
path は、ファイルダイアログの初期フォルダを指定します。./ で現在地で開きます。
filechooser.selection で選択したファイルのパスを取得できます。
py ファイル
def load(self, load_path):
    self.dismiss_popup()
    self.ids.label1.text = load_path[0]
filechooser.selection で取得したパスはリスト形式なので、load_path[0] で取り出します。
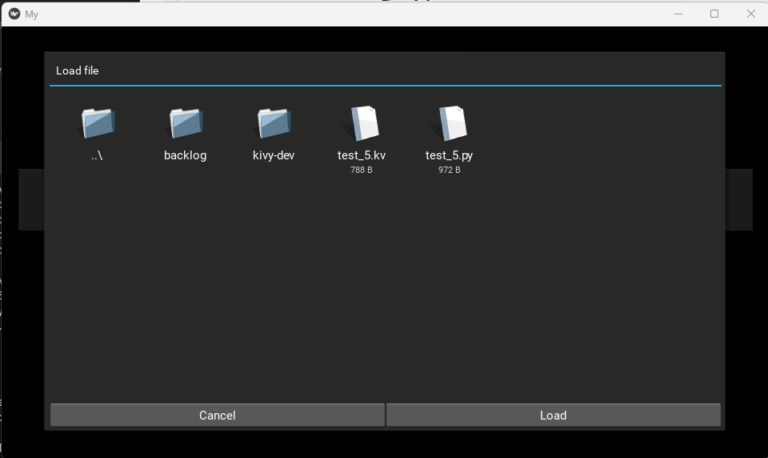
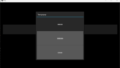
上記プログラムを実行すると、以下のような動作になります。

open popup ボタンをクリックします。

test_5.py を選択し、Load ボタンをクリックします。
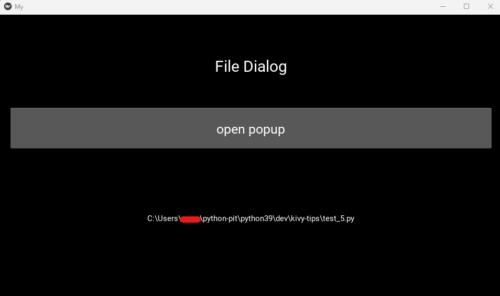
選択したファイルパスがラベルに表示されました。
おわりに
今回はファイルダイアログの作成方法について説明しました。
また、ObjectProperty の使い方についても説明しました。
これを使用すれば、別クラスの関数の読込が可能になります。
次回は、カメラ映像を Kivy で表示する方法について説明します。

コメント